
Resources and staff
Under Settings → Resources and Staff you register who serves at the store. Each staff member can have their own calendar and defines what they serve, when they work and what they can do in the system.
The screen
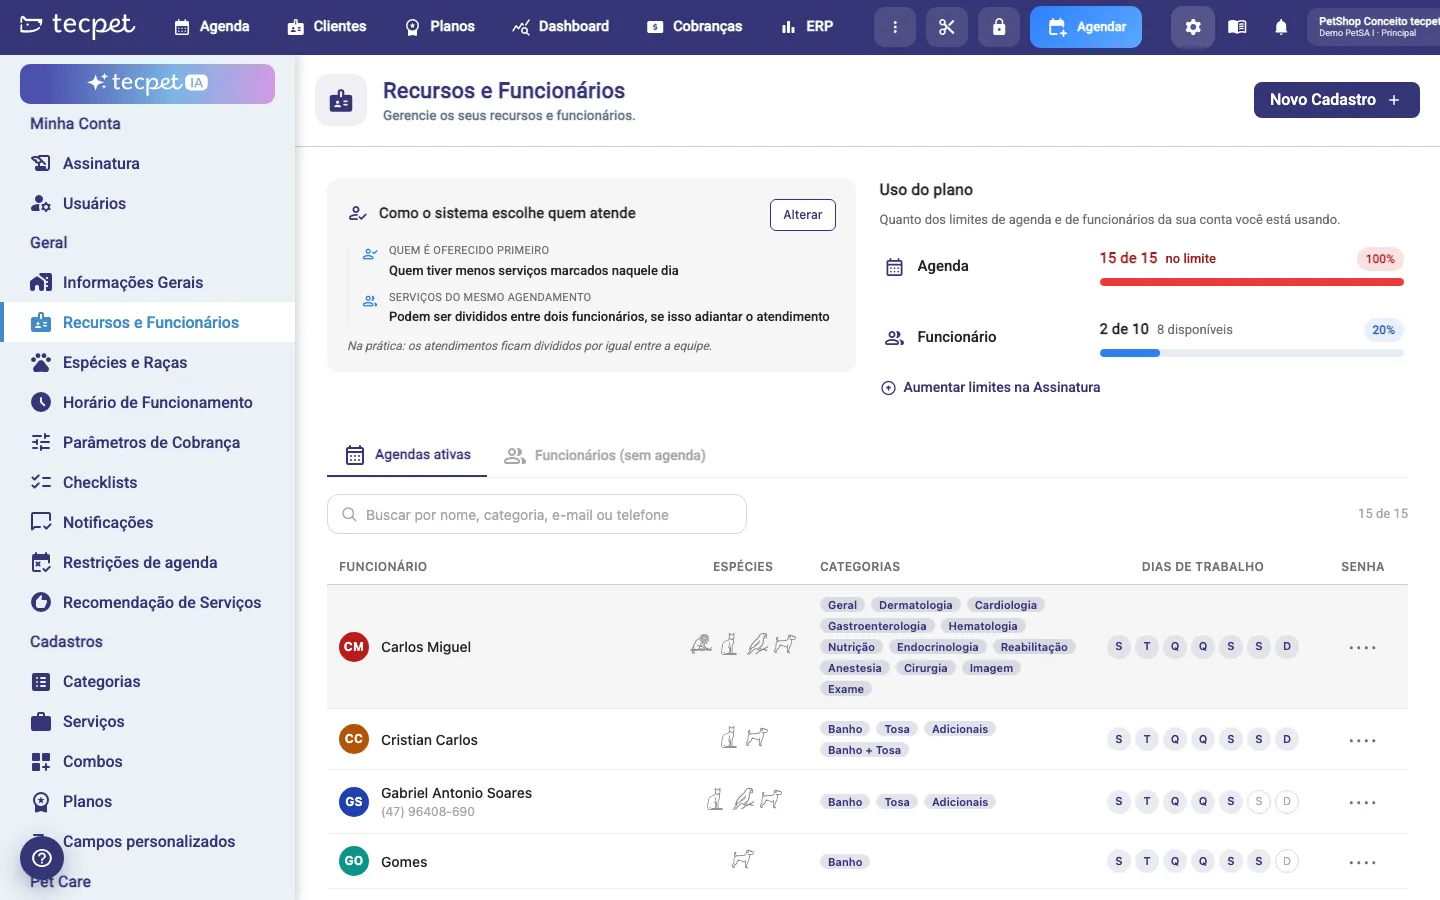
Section titled “The screen”The screen has, from top to bottom: the New Registration button at the top right; the How the system picks who serves card, with the summary of the allocation rule and the Change button (see below); the Plan usage card, with how much of your subscription’s Calendar and Staff limits you already use and the Increase limits in Subscription link; the tabs Active calendars (who has at least one work category and therefore shows on the calendar) and Staff (no calendar) (who has no category); the search Search by name, category, e-mail or phone, which ignores accents and case; and the list with Staff member, Species, Categories, Working days (M T W T F S S, days off in grey) and Password. Click the row to edit the staff member. The Password column shows ••••: clicking asks for the administrator password and reveals everyone’s operator code for one minute.
Step 1: New Registration
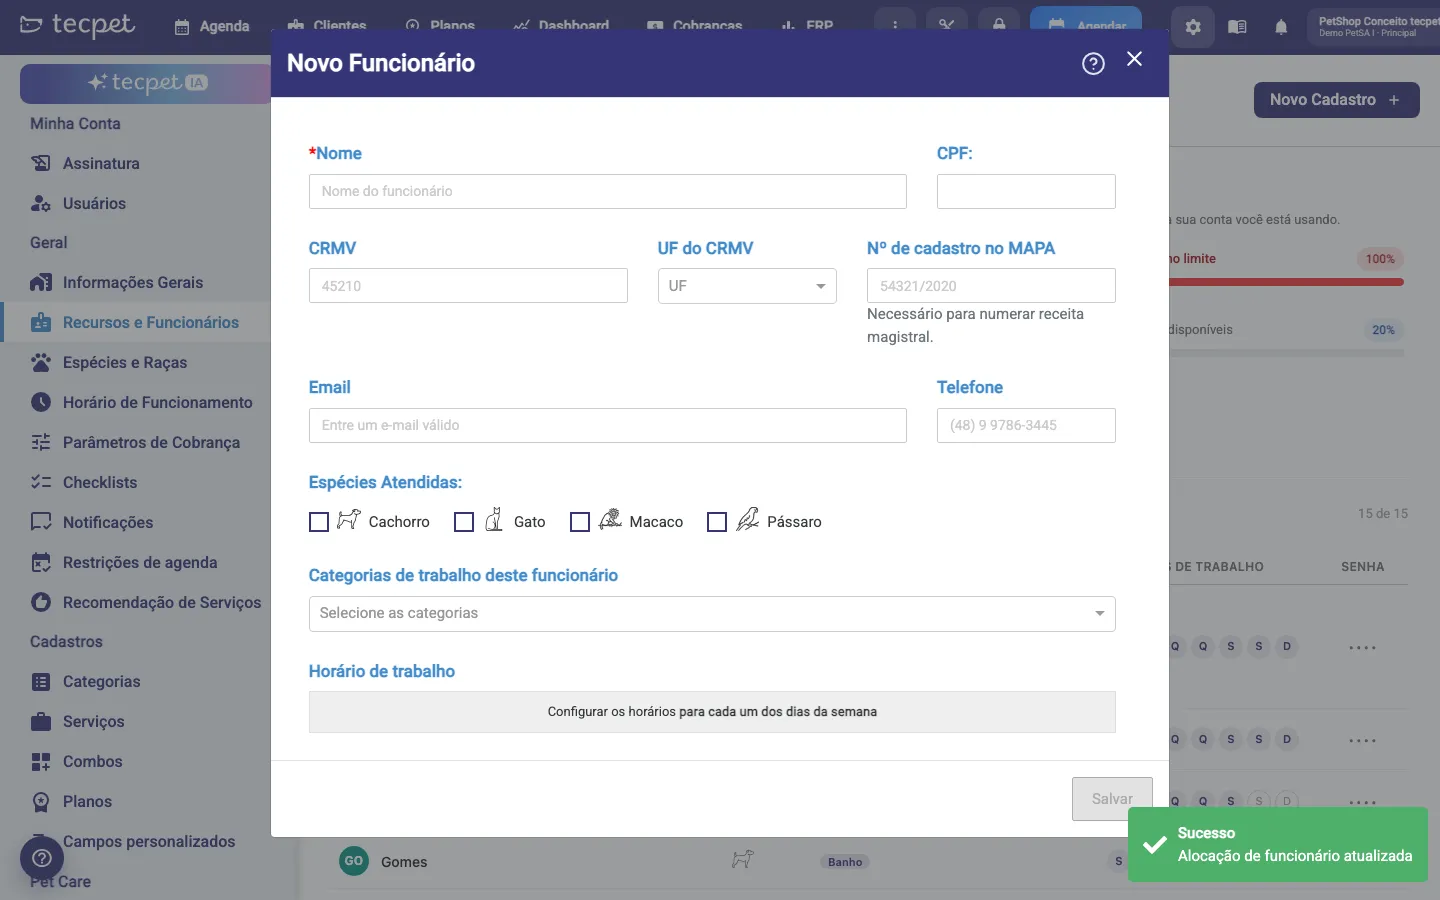
Section titled “Step 1: New Registration”Click New Registration to open the staff form. To edit someone who already exists, click their row on the list: the same form opens with the Edit title and the name.
Step 2: Data and what they serve
Section titled “Step 2: Data and what they serve”Fill in:
- Name* (required), Tax ID, Email and Phone;
- CRMV, CRMV state and MAPA registration no.: for veterinarians only. With the CRMV filled in, the staff member gets the veterinarian tag and can issue the controlled prescription; the MAPA number (54321/2020 format) is what numbers the compounded prescription;
- Served species: Dog, Cat, Rodent;
- Work categories: which service categories this staff member performs (e.g. only Bath, or Bath and Grooming). This controls which visits they can take.
Step 3: Working hours
Section titled “Step 3: Working hours”Under Working hours, turn on the days they work (Monday to Sunday) and set the time range for each day. Unchecked days are marked Doesn’t work. This schedule is what limits the professional’s calendar.
Step 4: Operator password and permissions
Section titled “Step 4: Operator password and permissions”Set the operator password (the code that identifies the staff member when operating) and check the permissions they’ll have:
- Registrar pagamento (dar baixa) (record payment) and Estornar pagamento (remover baixa) (reverse payment);
- Vender e/ou alterar agendamentos e planos (sell and/or change appointments and plans);
- Cancelar agendamentos (cancel appointments);
- Alterar faturas e itens de fatura (change invoices and invoice items), see Inside the invoice;
- Gerenciar produtos na fatura (manage products on the invoice), add and remove products on the invoice, when the shop has an ERP integration.
Further down, the Bloqueio de agenda → Ver/Editar Bloqueios button opens that professional’s blocks. When done, click Save.
How the system picks who serves
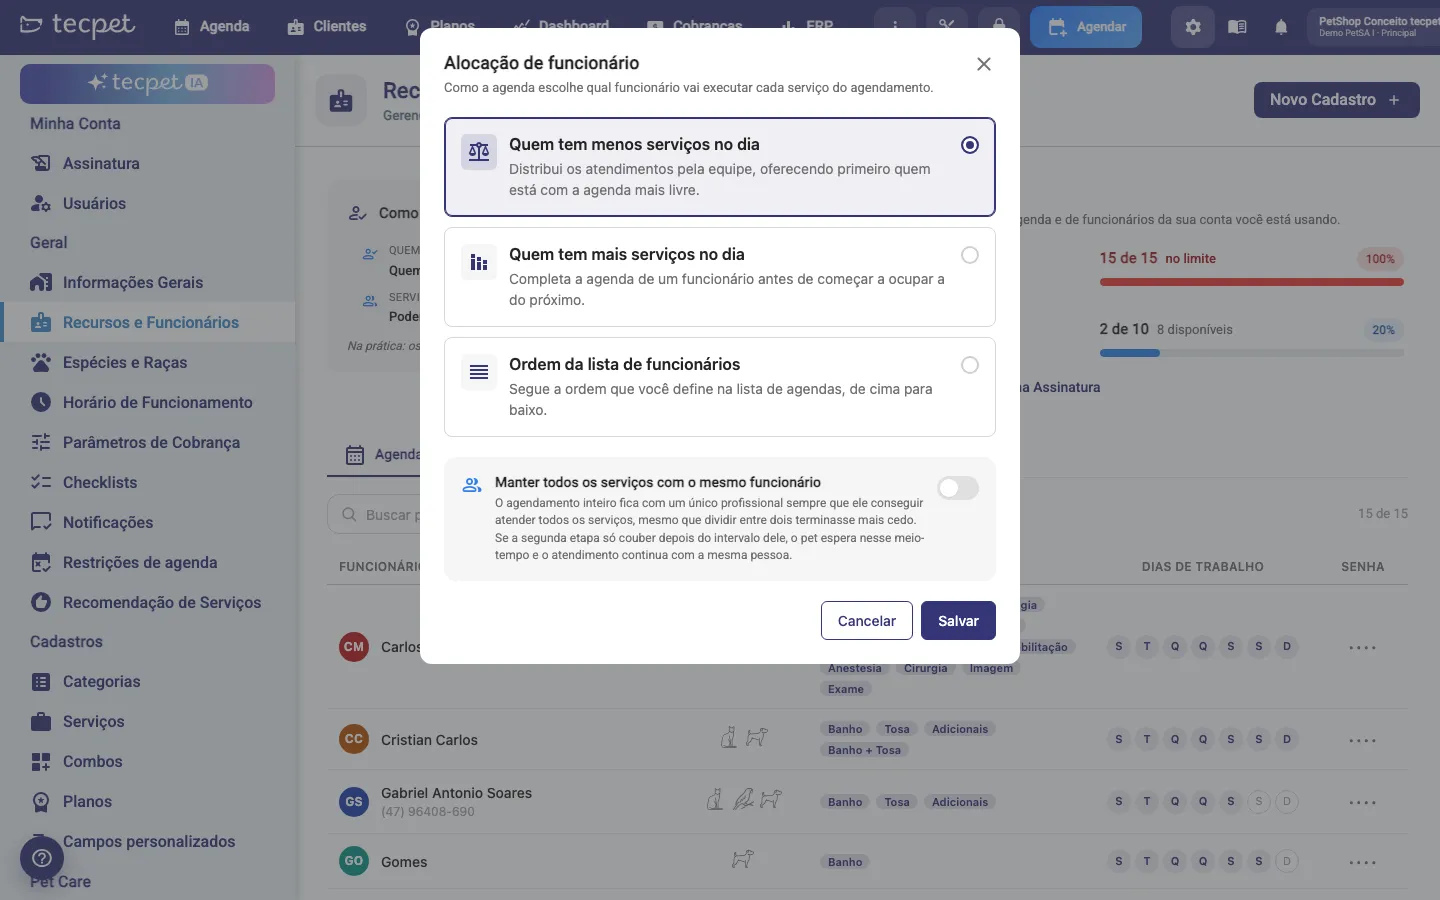
Section titled “How the system picks who serves”When a booking has a time and nobody picked the professional, tecpet decides who does each service. The rule applies to the booking wizard, the quick slot search, plan sales, fixed schedules, the blocking overbooking and also to the slots the AI and the chatbot offer on WhatsApp. The How the system picks who serves card summarizes the current rule; click Change to open the Staff allocation window and choose:
- Whoever has fewer services on the day (default): spreads the appointments across the team, offering first whoever has the freest calendar. In practice, appointments are split evenly;
- Whoever has more services on the day: fills one staff member’s calendar before starting to fill the next. One calendar fills up before the other starts receiving;
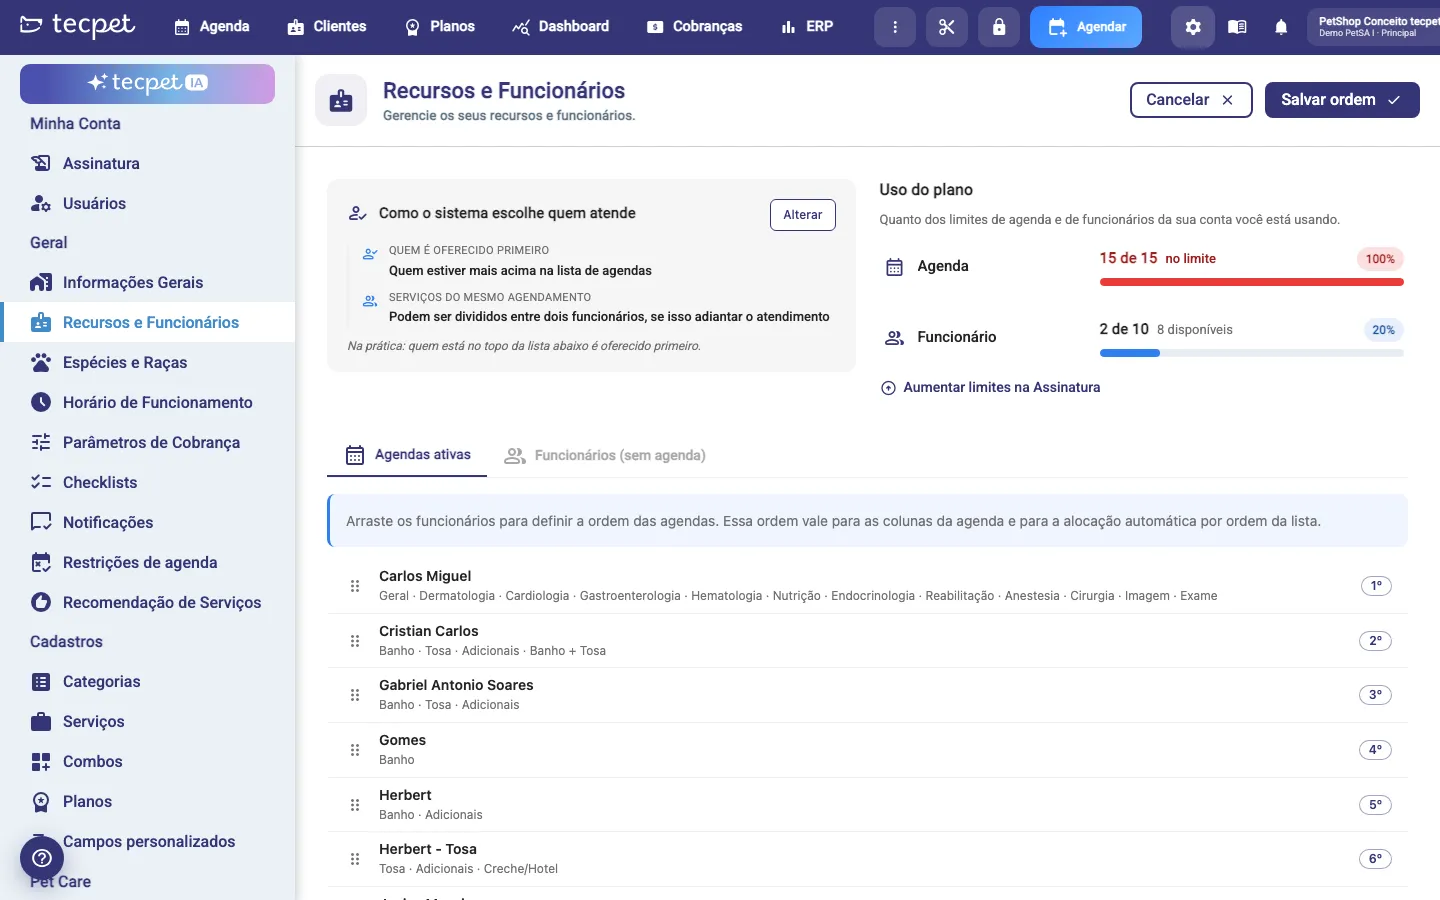
- Order of the staff list: follows the order you define on the calendar list, top to bottom (see Reordering the calendars).
The load considered is the number of services each one already has booked that day, and ties follow the list order. Below the options is the Keep all services with the same staff member switch: on, the whole booking stays with a single professional whenever they can handle all the services, even if splitting between two would finish earlier. If the second step only fits after their break, the pet waits that interval and stays with the same person. tecpet warns: this makes the calendar yield less. The preference only acts when Allow bookings split around the staff member’s break is Yes in Advanced settings and when there is a professional who handles all the categories and the pet’s species; pickup and delivery does not count. Click Save. Every change is logged in Settings → Change log, under the types Staff allocation and Same staff member on the booking.
Reordering the calendars
Section titled “Reordering the calendars”The order of the staff on the Active calendars list controls two things: the order of the columns per professional on the Calendar (Per professional view) and the allocation preference when the rule is Order of the staff list, including tie-breaks in the other rules. To change the order: choose Order of the staff list under Change and save; the Reorder calendars button shows up on the card.
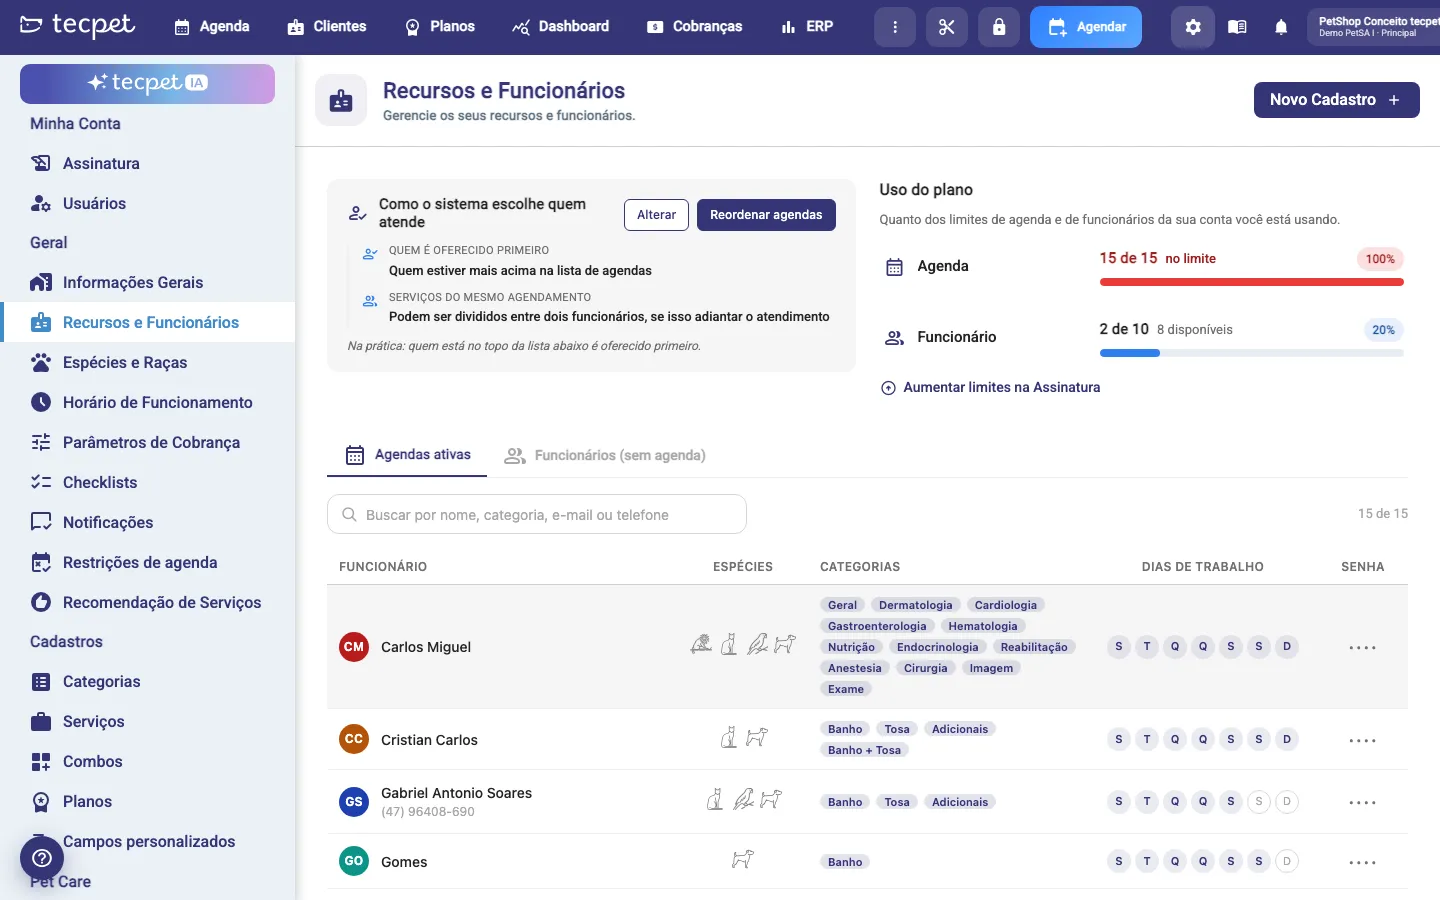
Click Reorder calendars: the list becomes a sequence with everyone’s position (1st, 2nd, 3rd…). Drag the staff into the desired order and click Save order at the top (Cancel discards). The order applies to every segment. Staff without a category are not on the list, because they have no calendar column and receive no services.
Notifications and client phone privacy
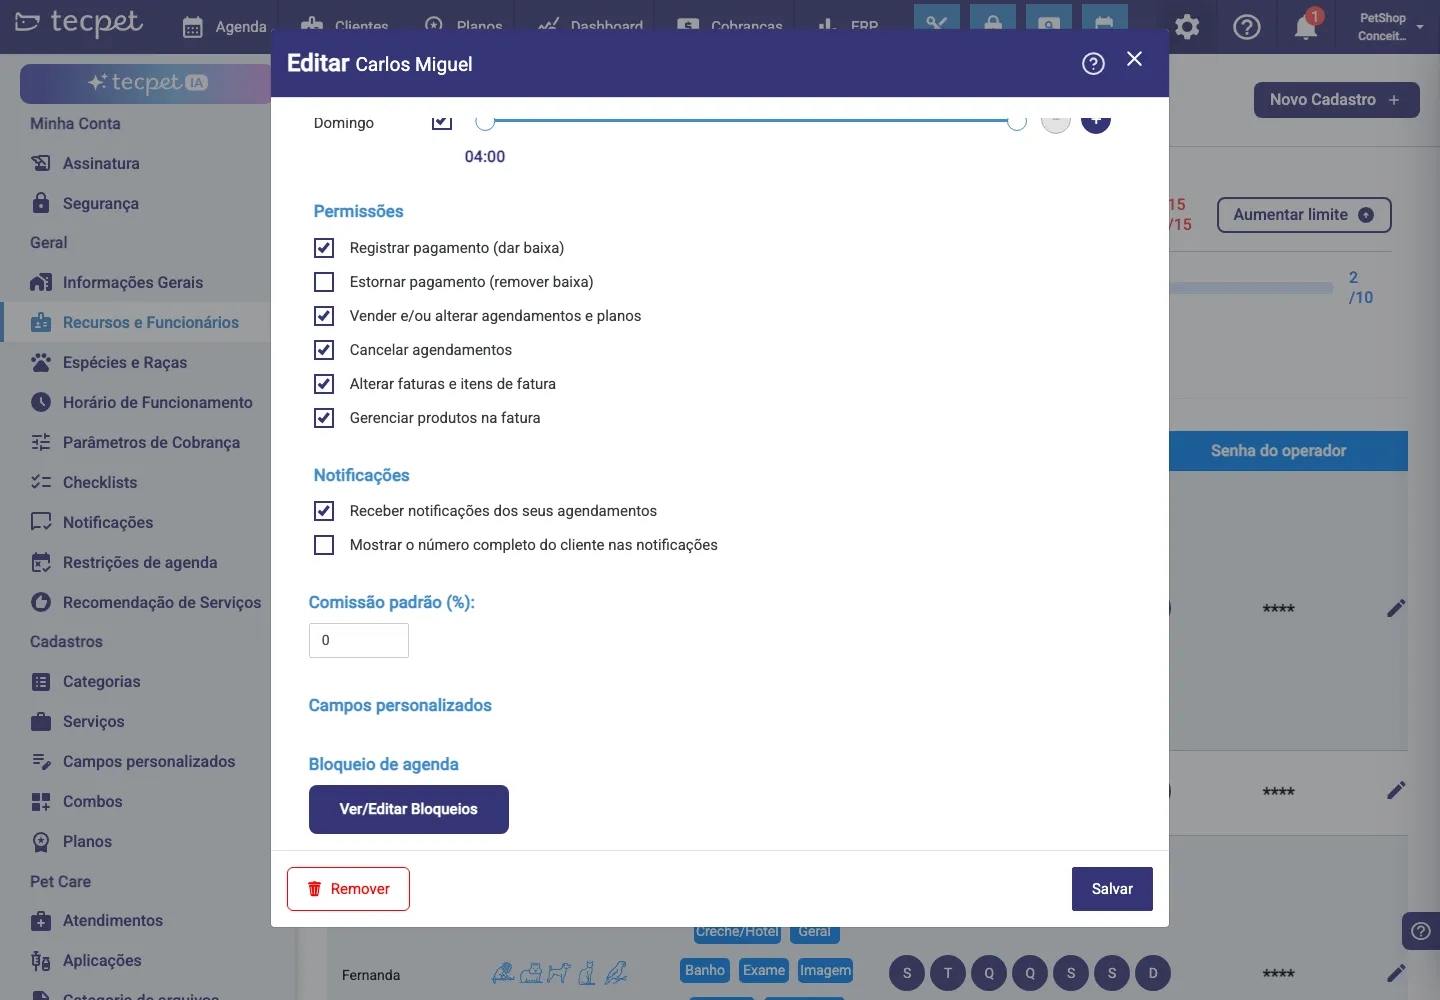
Section titled “Notifications and client phone privacy”In the staff member’s Notificações (notifications) section:
- Receber notificações dos seus agendamentos (receive their appointment notifications), turns on the internal appointment alerts for this staff member.
- Mostrar o número completo do cliente nas notificações (show the client’s full number in notifications), controls phone privacy. By default, the client’s number appears masked in the team’s internal notifications: only the last 2 digits are visible (e.g.
•••••••••88). Check this option only for staff who may see the full number. It appears when Receber notificações dos seus agendamentos is on.
Controlling what the team sees (revenue and client data)
Section titled “Controlling what the team sees (revenue and client data)”If the concern is that the operational team sees revenue, prices and information beyond what’s needed, control happens in different layers:
- Employee financial and admin permissions: here in Resources and Employees (Step 4), you uncheck each staff member’s sensitive actions (record/reverse payment, sell and change appointments, edit invoices and invoice items). This way they run the service without touching billing. Important: unchecking an action blocks the action, but doesn’t hide the screens: the staff member still navigates the menu.
- Billing reports (the company’s revenue): what protects these reports is the 6-digit administrator password. For an employee not to see the store’s revenue, the owner must keep this password secret (and change it if it leaked), without the 6-digit password, the billing reports don’t open.
- Access to client data: to require identification when opening a client’s record, turn on Ask for the employee when accessing client information in Advanced settings: the system then asks for the employee’s operator code to open the client’s data.
With calendar × without calendar
Section titled “With calendar × without calendar”Whoever has at least one work category shows on the Active calendars tab: they have a calendar column and can receive services. Whoever has no category stays on the Staff (no calendar) tab: they exist for commissions, operation and operator password, but receive no appointments. To move someone from one tab to the other, just add or remove the categories on their record.