Create a plan or package
Plan and package are the same record — what changes is the Plan type: the Monthly, Quarterly, Half-yearly and Yearly types are recurring plans (they renew and grant the right to use the services each period), and Package is a one-off bundle with limited validity. On this screen you build the template: which services are included, how many times, whether time slots are reserved automatically, how long it lasts and the price. This template is what shows up to sell later and what the PetBot AI can offer on WhatsApp. To just track plans already sold, use the Track plans and packages screen.
Step 1 — Open Plans
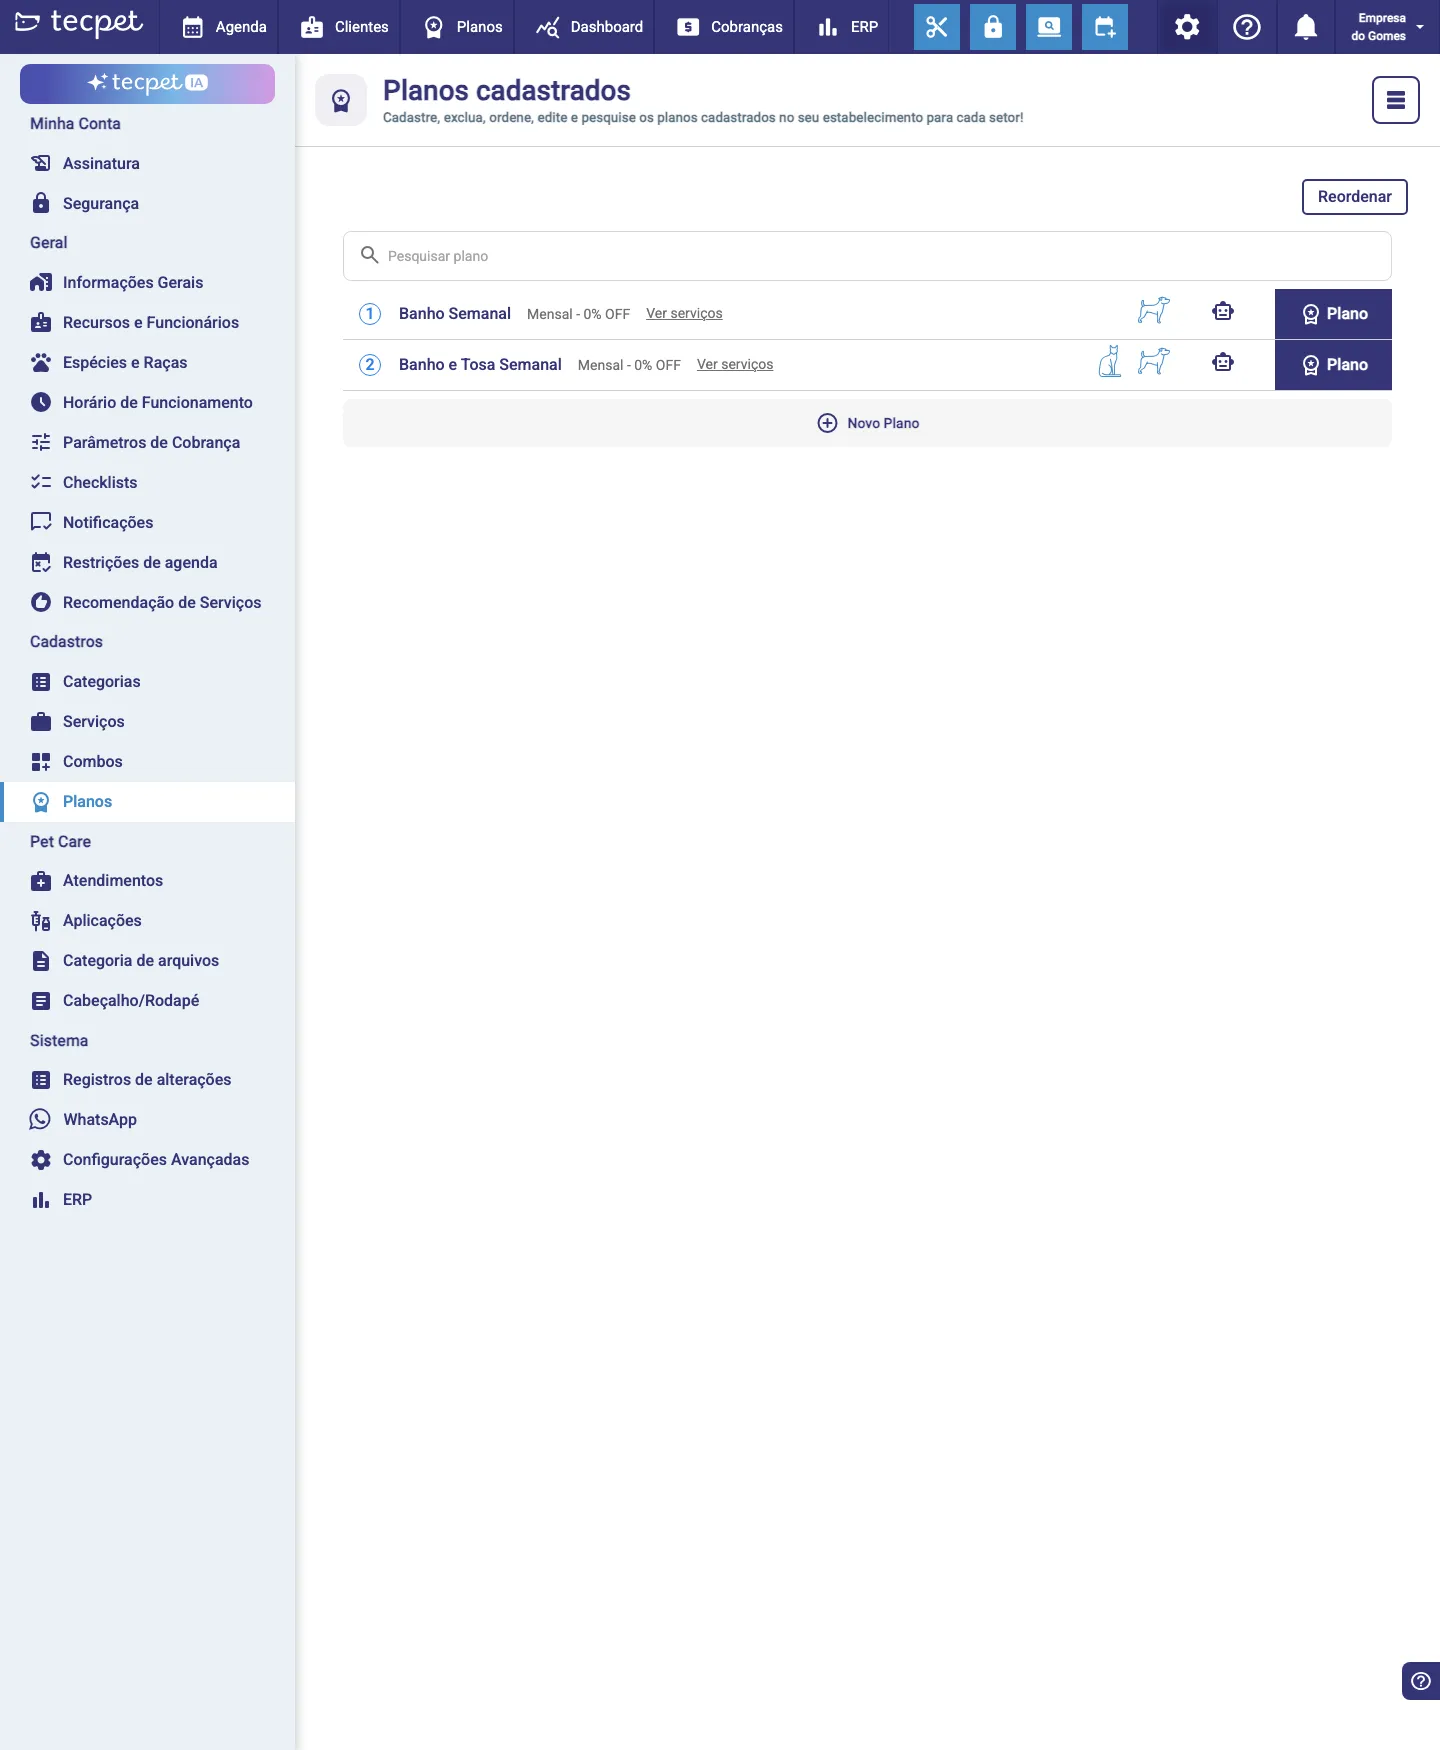
Section titled “Step 1 — Open Plans”In the side menu, go to Settings (it will ask for the admin password) and open the Combos and Plans → Plans group. The screen lists the plans and packages already registered. (This screen sits right next to Combos — don’t mix them up: a combo is a bundle of services sold together in a single appointment; a plan/package is recurring or time-limited.)
Step 2 — Click New Plan
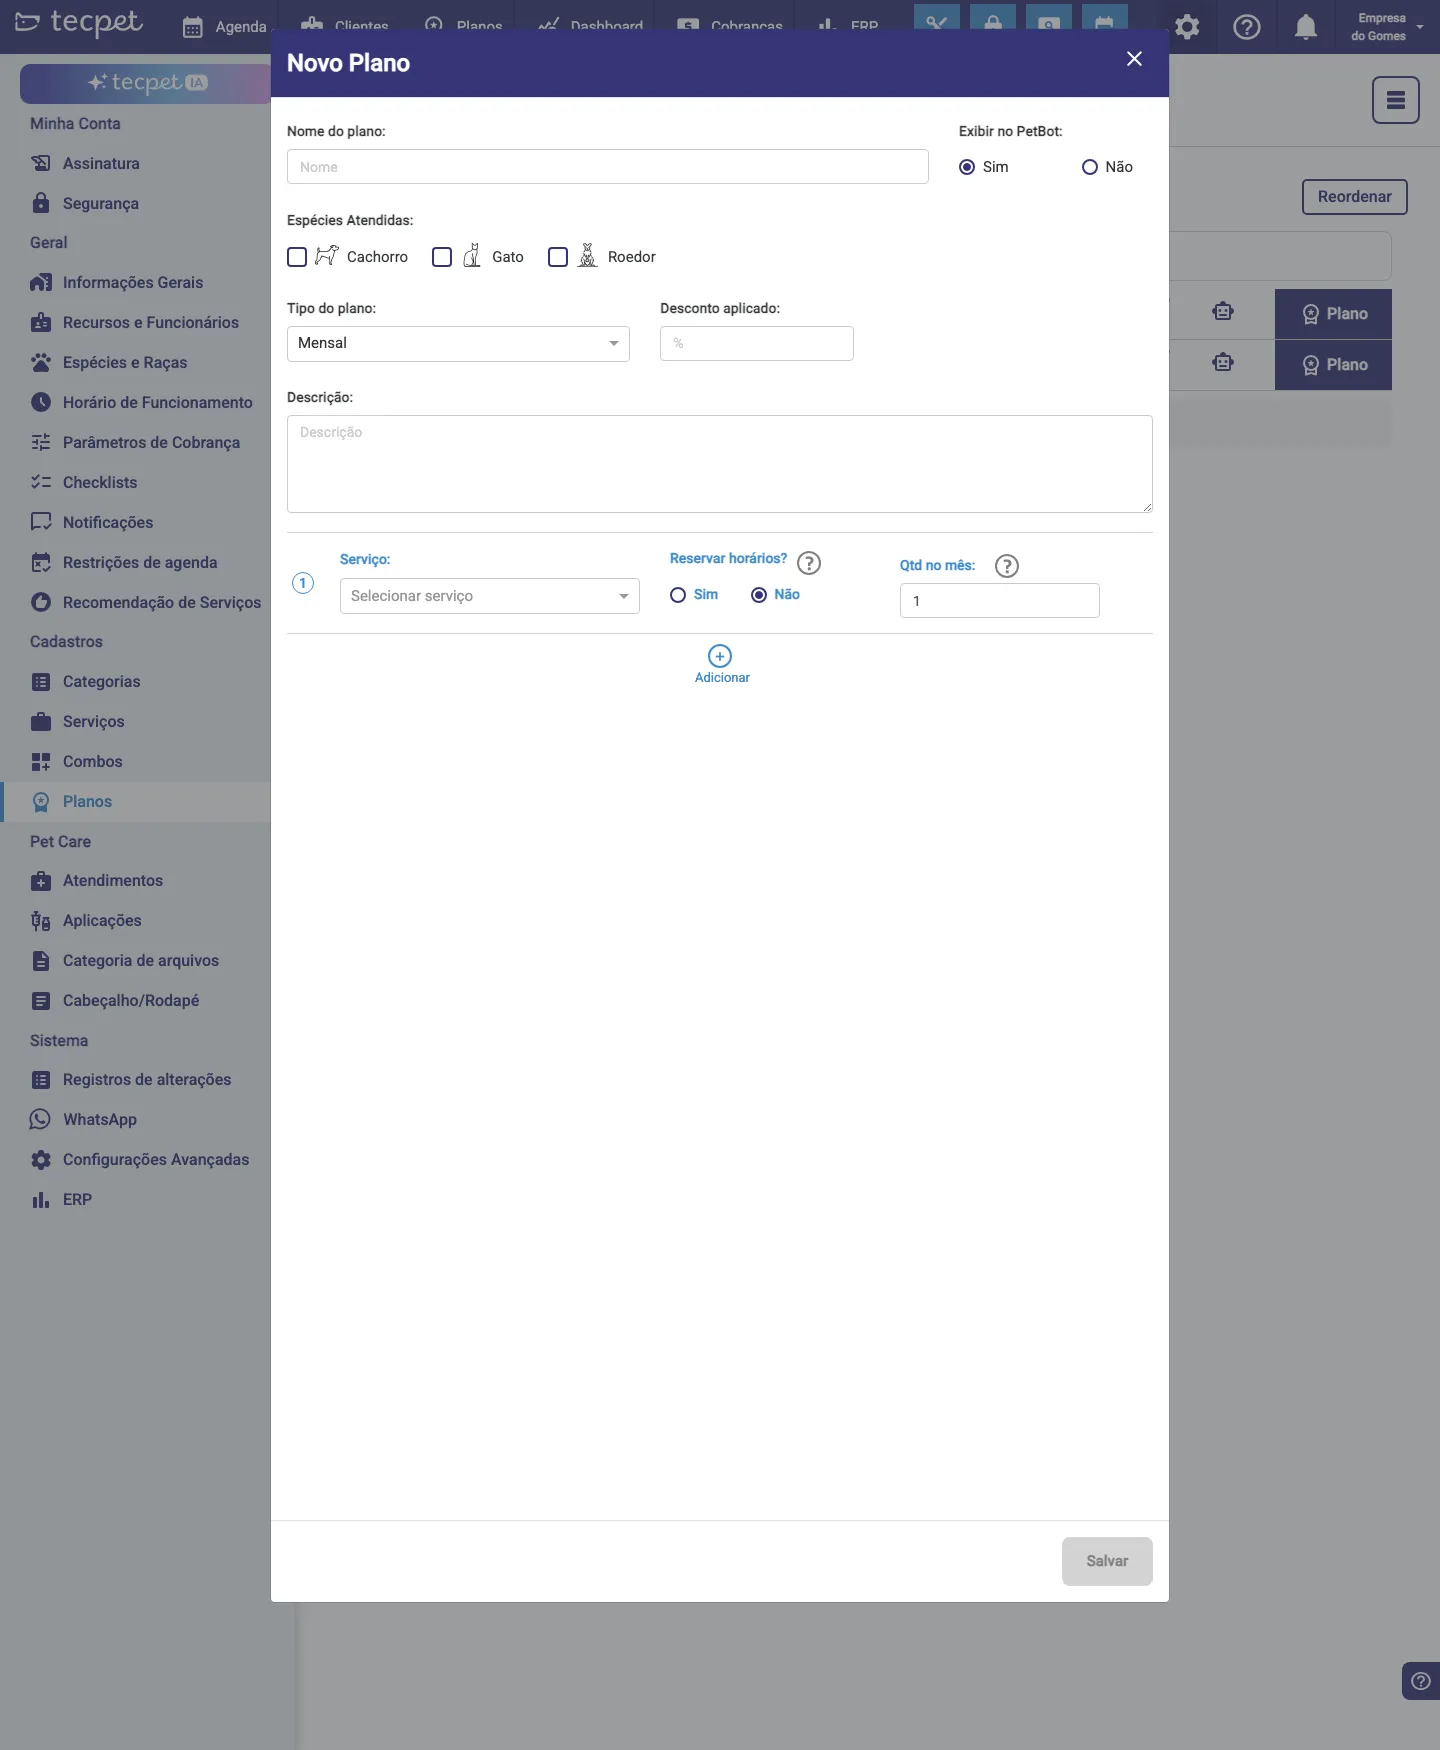
Section titled “Step 2 — Click New Plan”At the end of the list, click New Plan. The New Plan modal opens with all the fields. Fields marked with an asterisk (*) are required — while any are missing (or the service rules don’t add up), the Save button stays disabled.
Plan details
Section titled “Plan details”Fill in, in the order they appear:
- Plan name* — how the plan shows at the sale and on tracking;
- Show on PetBot (Yes/No) — controls whether the WhatsApp AI can offer this plan on its own. Keep it Yes for plans you want the bot to sell;
- Served species* — tick at least one species (Dog, Cat…). The species shown are the ones your store registered in Species and breeds. With none ticked, the system warns you and won’t save;
- Plan type — Monthly, Quarterly, Half-yearly, Yearly (recurring) or Package. This choice defines whether it’s a plan or a package, and it makes the fields below appear/disappear;
- Description — optional; free text that helps you (and the AI) explain the plan.
Fields that appear depending on the Type
Section titled “Fields that appear depending on the Type”Some fields only appear depending on the Plan type:
- % Discount applied — appears on the recurring types (and only when your store charges by size & coat, not by breed). It’s the discount the system applies to the sum of the services to reach the plan price;
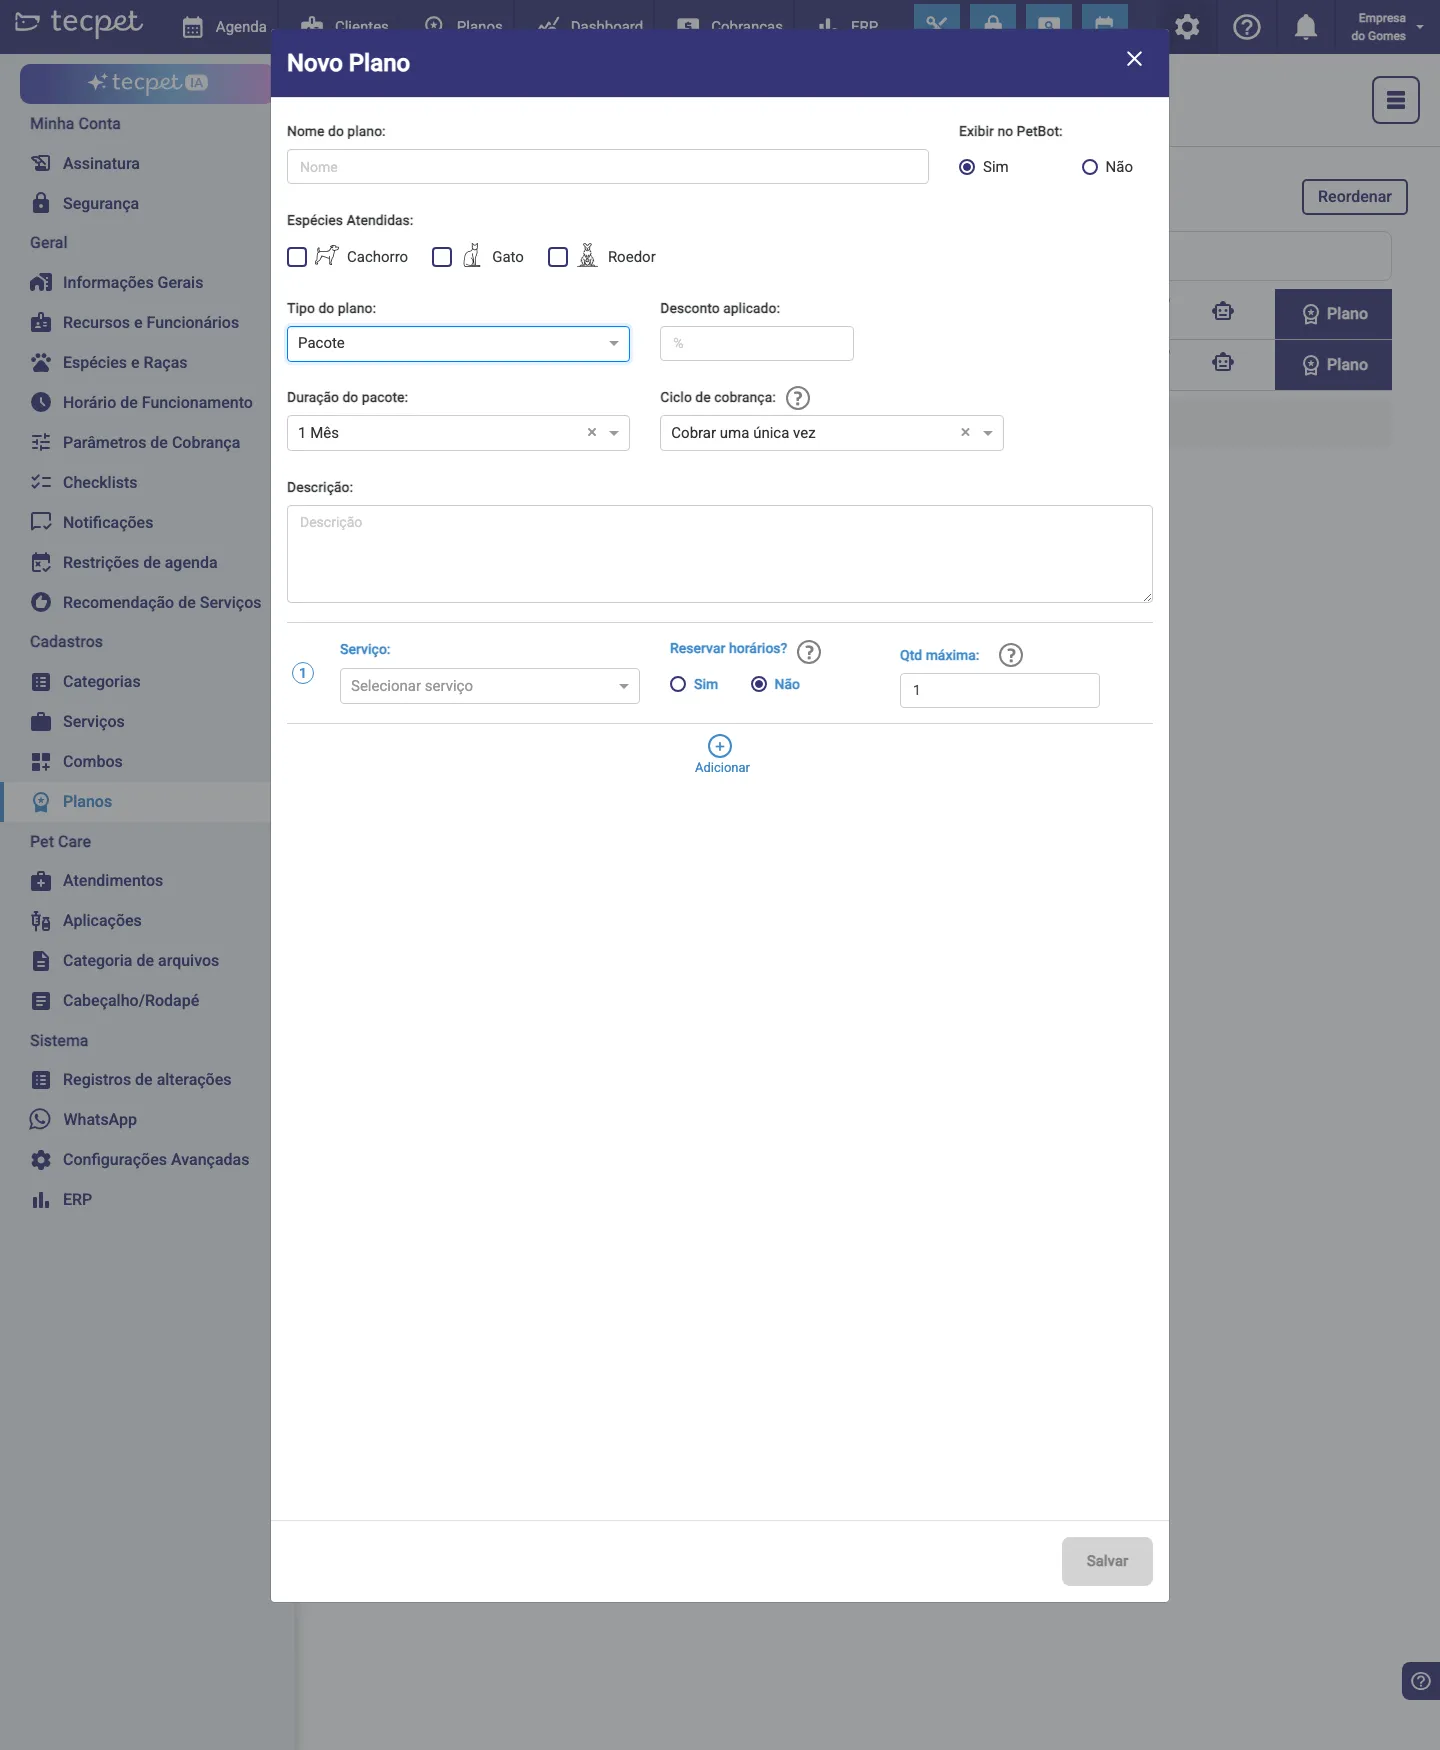
- Package duration — appears only on Package: from 1 to 12 months, it’s how long the package is valid once sold;
- Billing cycle — appears only on Package. It sets how the customer is charged: Charge once (a single invoice, everything together) or Charge every 1, 2, 3, 4 or 5 appointments (one invoice per N appointments used). There’s a ? button next to it explaining.
Plan services
Section titled “Plan services”Now build which services the plan grants. For each item:
- Service — pick a specific service (not a category; each service is added individually). See Create a service if you need to register it first;
- Reserve time slots? (Yes/No) — with Yes, the system schedules the slots automatically (the day and time are chosen at the sale). With No, the customer books each time manually;
- when Reserve time slots? = Yes, Frequency appears: Weekly (one appointment per week) or Fortnightly (one every two weeks). If Weekly, Qty per week also appears (how many times a week, from 1 to 7);
- Quantity — how many times the customer can use that service. The label changes with the type: Qty per month (recurring plans), Qty per cycle (package with a billing cycle) or Max qty (package without a cycle / single charge).
Use Add to include more services in the plan, and the trash icon (or the item number) to remove one.
Step 3 — Set the prices and save
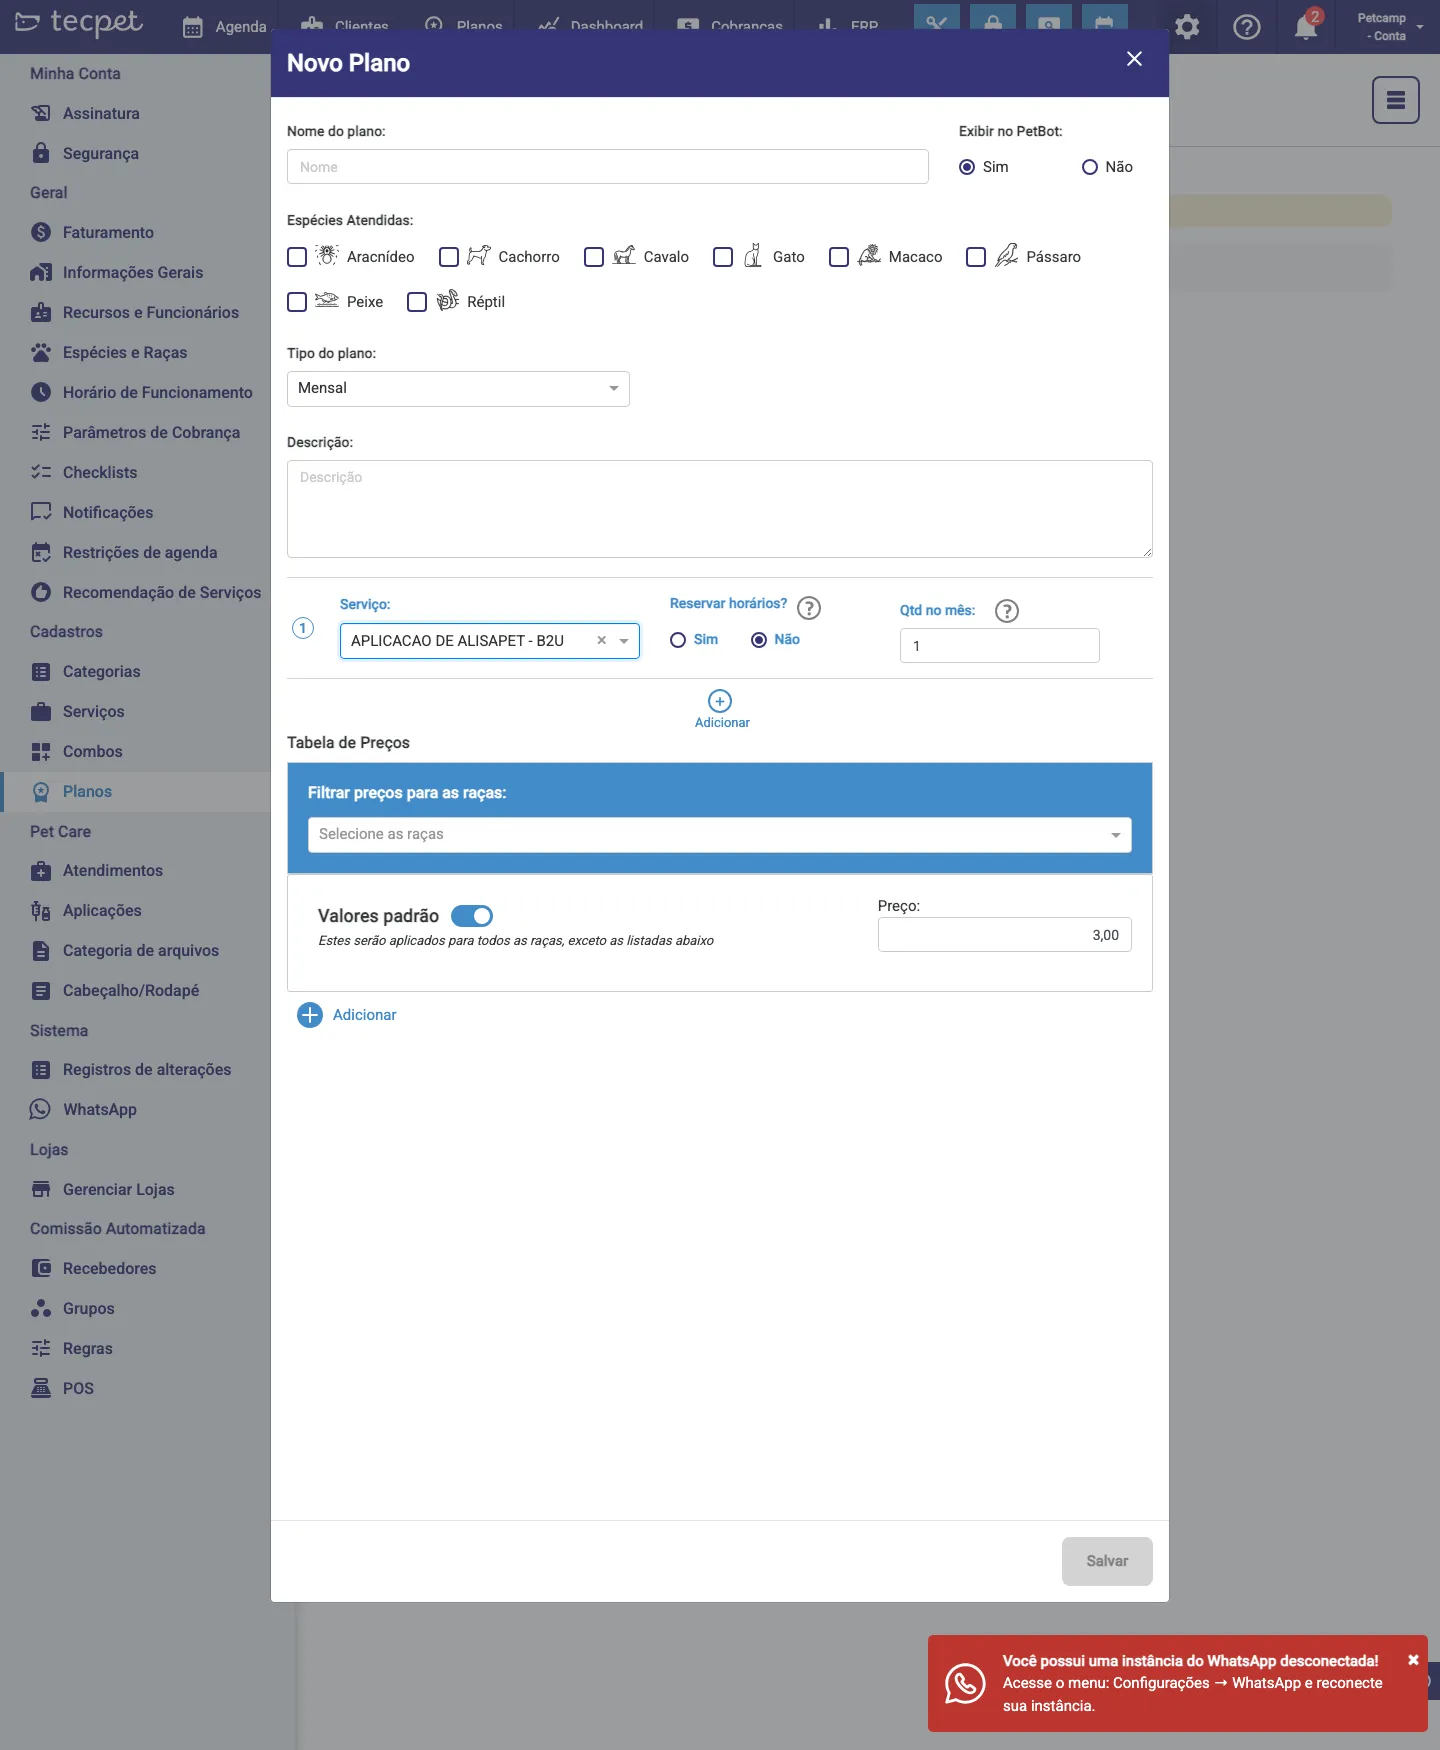
Section titled “Step 3 — Set the prices and save”At the bottom of the modal is the price table — and its format depends on your store’s billing mode (by size & coat or by breed). See your case in the section below (pick your type in the selector at the top of the article). With everything filled in and the rules met, click Save: the plan now appears in the list and is ready to sell.

How to edit or remove later
Section titled “How to edit or remove later”In the Plans list, click a plan to reopen the modal (now as Edit) — change what you need and click Save. To delete it, open the plan and use Remove (it asks for confirmation). Important: touching the template does not change plans already sold — each sale kept a copy of the services, price and validity that were in effect at the time.
The price table according to your billing mode
Section titled “The price table according to your billing mode”Your store charges by size & coat. At the bottom of the modal there’s a price table with one row for each Size (Micro, Small, Medium, Big, Giant) and Coat (Short, Medium, Long) combination. Each row shows: the Value of each service already multiplied by its quantity, the Total (full sum, no discount), the Total with discount (the Total with the % Discount applied) and the Manual entry column. By default the price used is the Total with discount; if you want to lock your own value for that row, tick Manual entry and type the amount — it then takes over from the calculated one.
By breed
Your store charges by breed. Instead of the size×coat table, the Filter prices by breed block appears: you select the breeds and set the price for each one for the plan. In this mode the % Discount applied field does not show — you enter the final per-breed price directly. (The by-breed billing mode is set in Billing parameters.)