Inside an invoice
Almost everything in TecPet generates an invoice: an appointment, a counter sale, the purchase of a plan/package. They all live under Billing. Here we explain the invoice from the inside — what you see and do when you open it. (To track the list day to day, see Track billing.)
Invoice types
Section titled “Invoice types”By Type, an invoice can be:
- Appointment — generated by an appointment (linked to it);
- Plan/Package — for the purchase or use of a plan;
- Standalone — a charge created manually, with no appointment;
- Voucher — related to a credit/voucher.
The type influences what you can edit and the footer texts.
Sell a product (standalone sale)
Section titled “Sell a product (standalone sale)”To sell a product or charge for something without an appointment, create a standalone sale:
- Open the customer profile and click New sale — the New Invoice window opens;
- Under Items, click the +. In the Type field, choose Product (the list also has Service, Voucher, Pickup & delivery and Other);
- Fill in the Product name, the Value (R$) and the Quantity, then click Save;
- Repeat to add more items. If you like, write a Note and adjust the Due date;
- Click Pay to get paid right away, or Send to deliver the charge via WhatsApp.
Products and stock
Section titled “Products and stock”TecPet has no built-in product catalog or stock control — the Product name is typed freely at the time of sale. Stock is only moved when the store uses an ERP integration: with VHSYS, for example, the invoice’s product becomes a Sales Order and reduces stock there. See What changes with the integration on and VHSYS integration.
A product is always added at full price: Product items don’t accept a discount on the invoice. Any product discount is applied later, in the ERP/POS.
Find the invoice (filters)
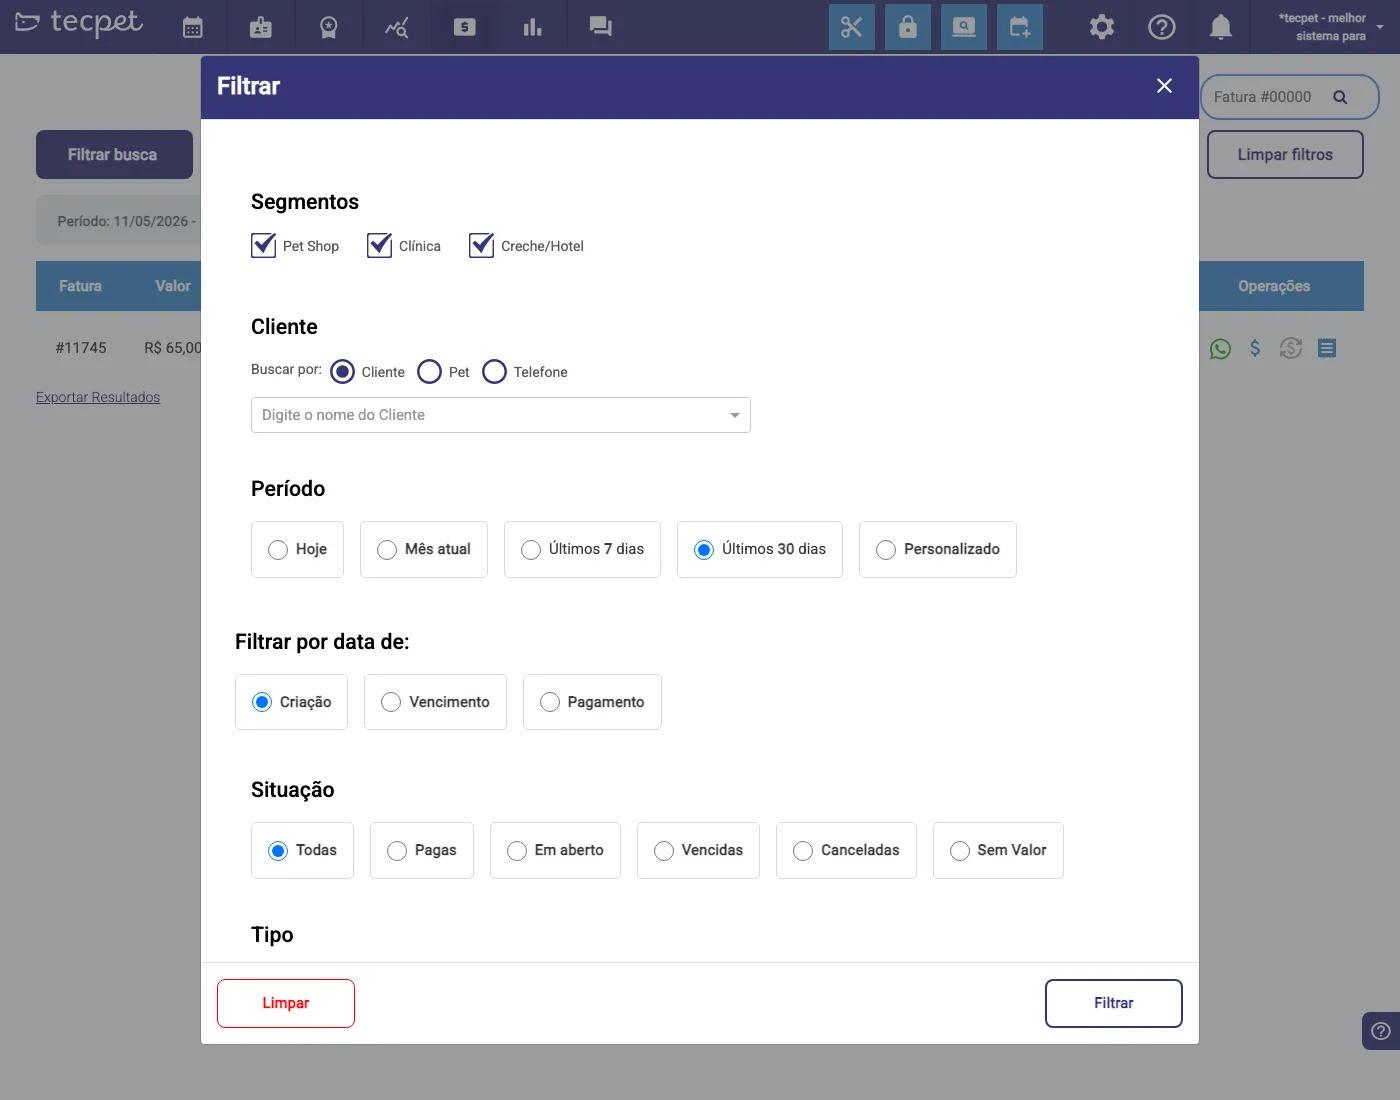
Section titled “Find the invoice (filters)”Under Billing, click Filter search to open the filters: period and date by (creation, due, payment); status (All, Paid, Open, Overdue, Cancelled, No value); and type (Appointment, Plan/Package, Standalone, Voucher). Click Filter to apply.
Open an invoice
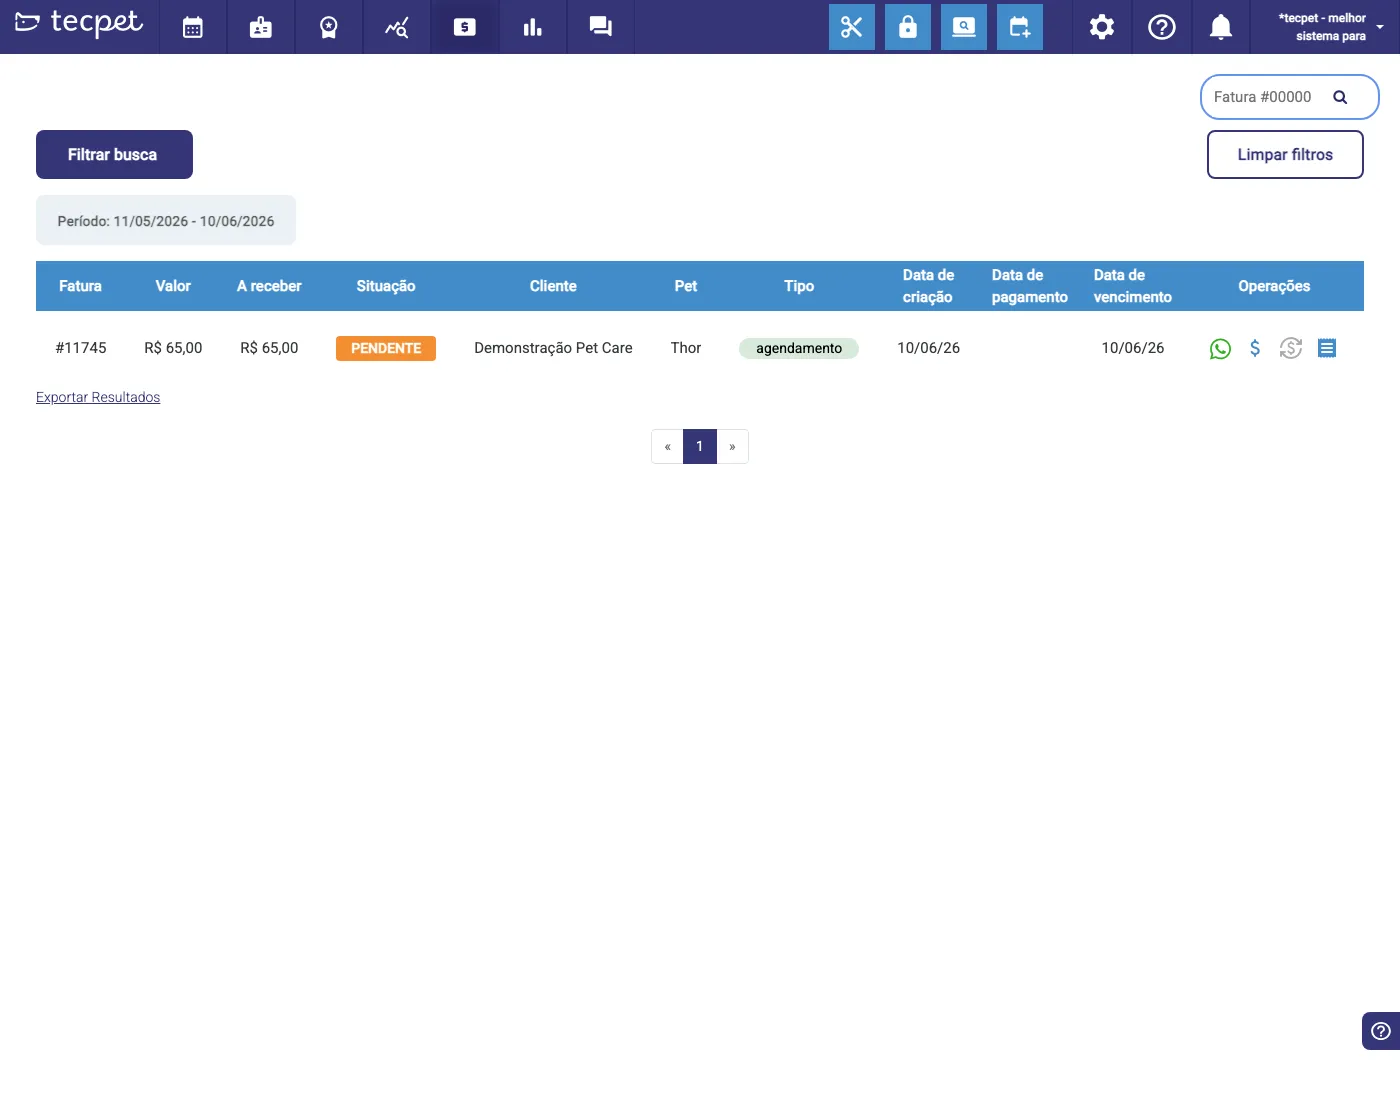
Section titled “Open an invoice”In the list, each invoice has Operations icons: WhatsApp, $ (register payment) and the document icon, which opens the invoice. Click the document icon on the desired row.
Inside the invoice
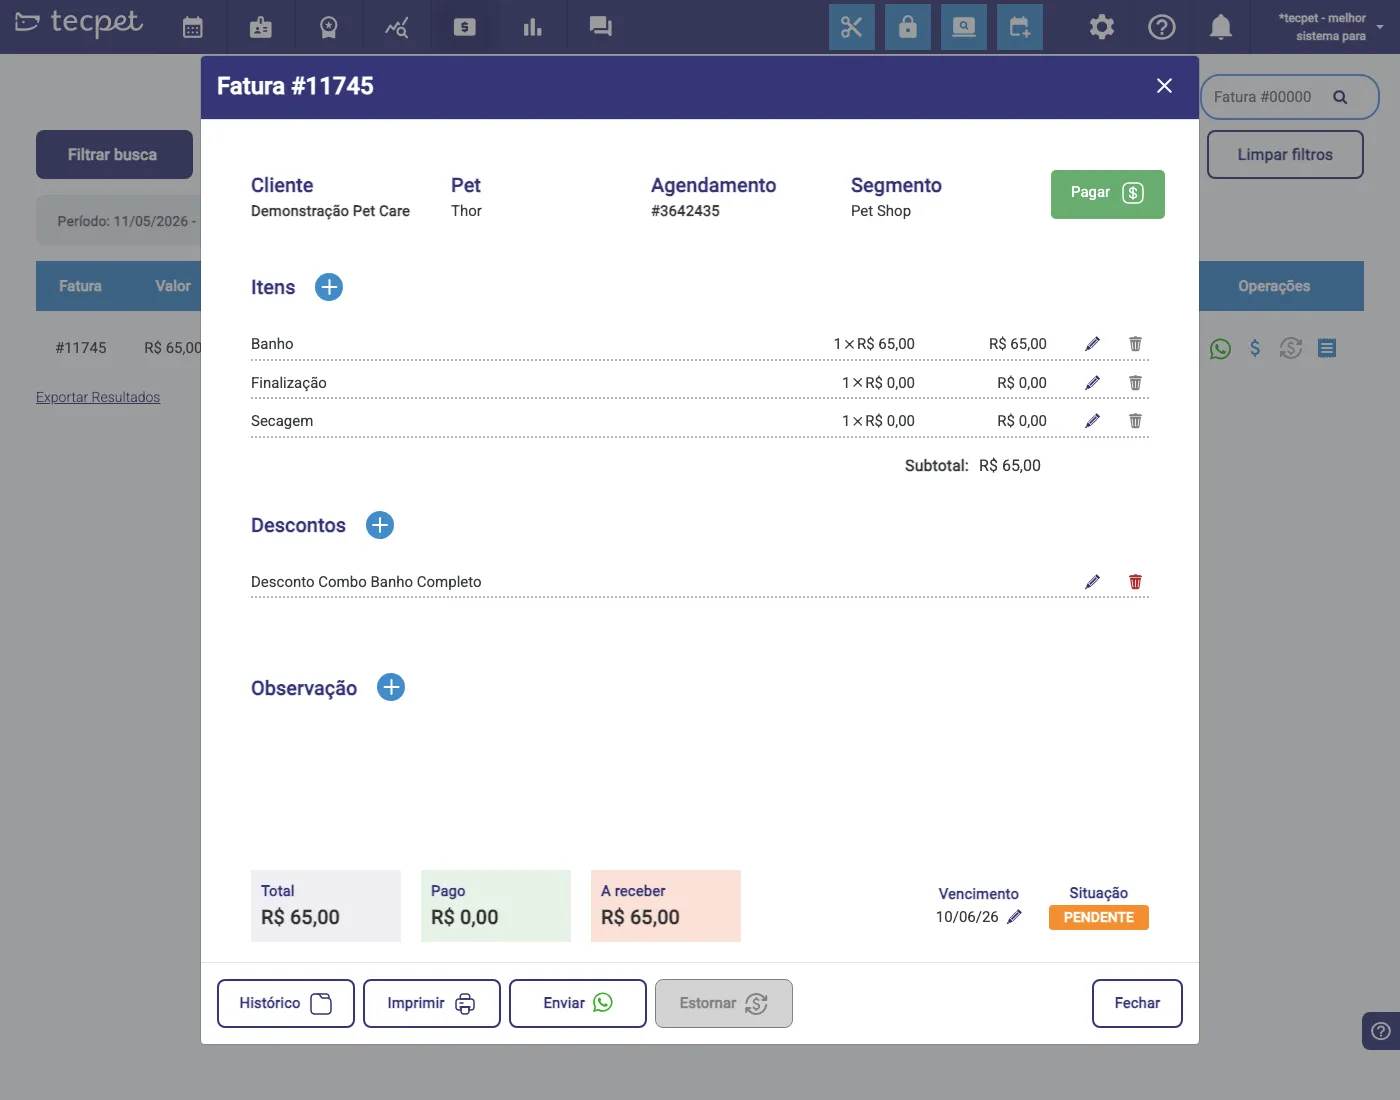
Section titled “Inside the invoice”The window shows, at the top, Customer, Pet, Appointment (when there is one), Segment and the Pay button. Below:
- Items — the services/products charged; + adds an item, the pencil edits the value/quantity and the trash removes it;
- Discounts — discounts applied (e.g. a combo discount); you can add/edit;
- Note — a free note on the invoice;
- Subtotal and, in the footer, Total, Paid and To receive, plus the Due date (editable) and the Status (Pending, Paid, Overdue…).
The footer buttons
Section titled “The footer buttons”At the bottom of the window:
- Pay (at the top) — registers the invoice payment;
- History — all changes to the invoice;
- Print — generates the invoice for printing;
- Send — delivers the charge via WhatsApp;
- Reverse — undoes the payment (only on an already-paid invoice);
- Close.