
Create a service
Services are what you schedule, perform and charge for (bath, grooming, consultation, day use…). Every service lives inside a category and a segment (Pet Shop, Clinic, Daycare/Hotel, Hotel), and this registration feeds the rest of the system: the duration defines how much time the slot takes on the calendar, the value defines what goes on the invoice, the served species define which pets it can be sold to, and Show on PetBot defines whether the WhatsApp AI may offer it.
Step 1: Open Services
Section titled “Step 1: Open Services”Go to Settings (the system will ask for the admin password) and, in the side menu, to Registers → Services. The screen opens on Registered services.
In the top right corner are the segment tabs: Pet Shop, Clinic, Daycare/Hotel and Hotel. Only the segments your store has active show up, so, depending on your contract, you may see three, two or just one. Pick the tab before registering: the service is created inside the segment that is selected.
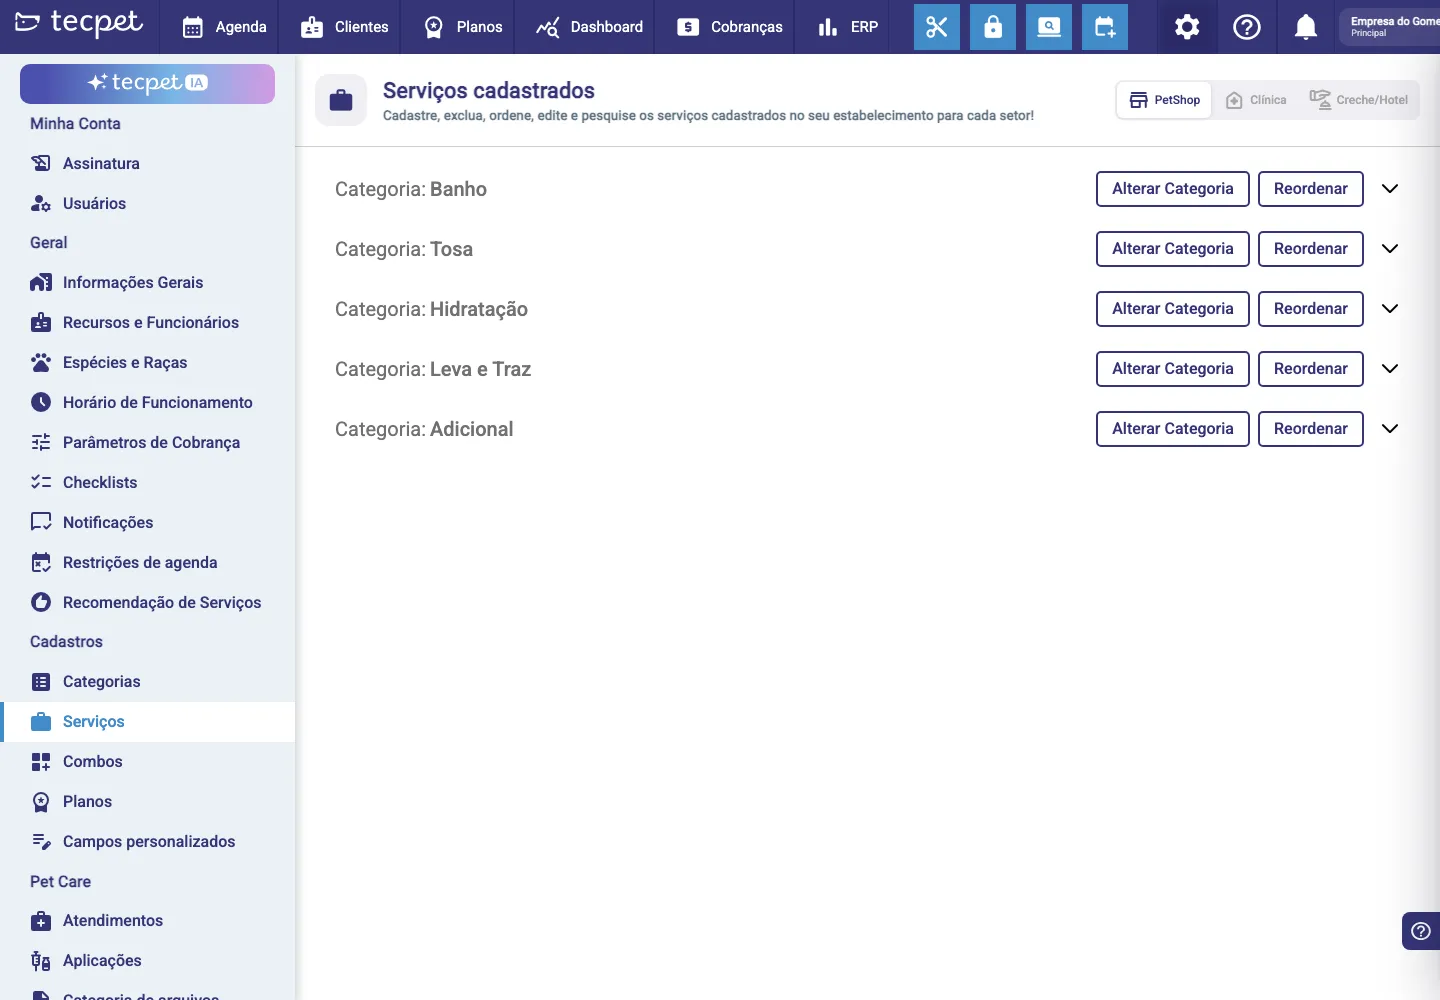
Services appear grouped by category, one bar per category in the format Category: name (Bath, Grooming, Moisturizing, Pick-up & Drop-off, Add-on…), all collapsed.
Step 2: Open the category and click New service
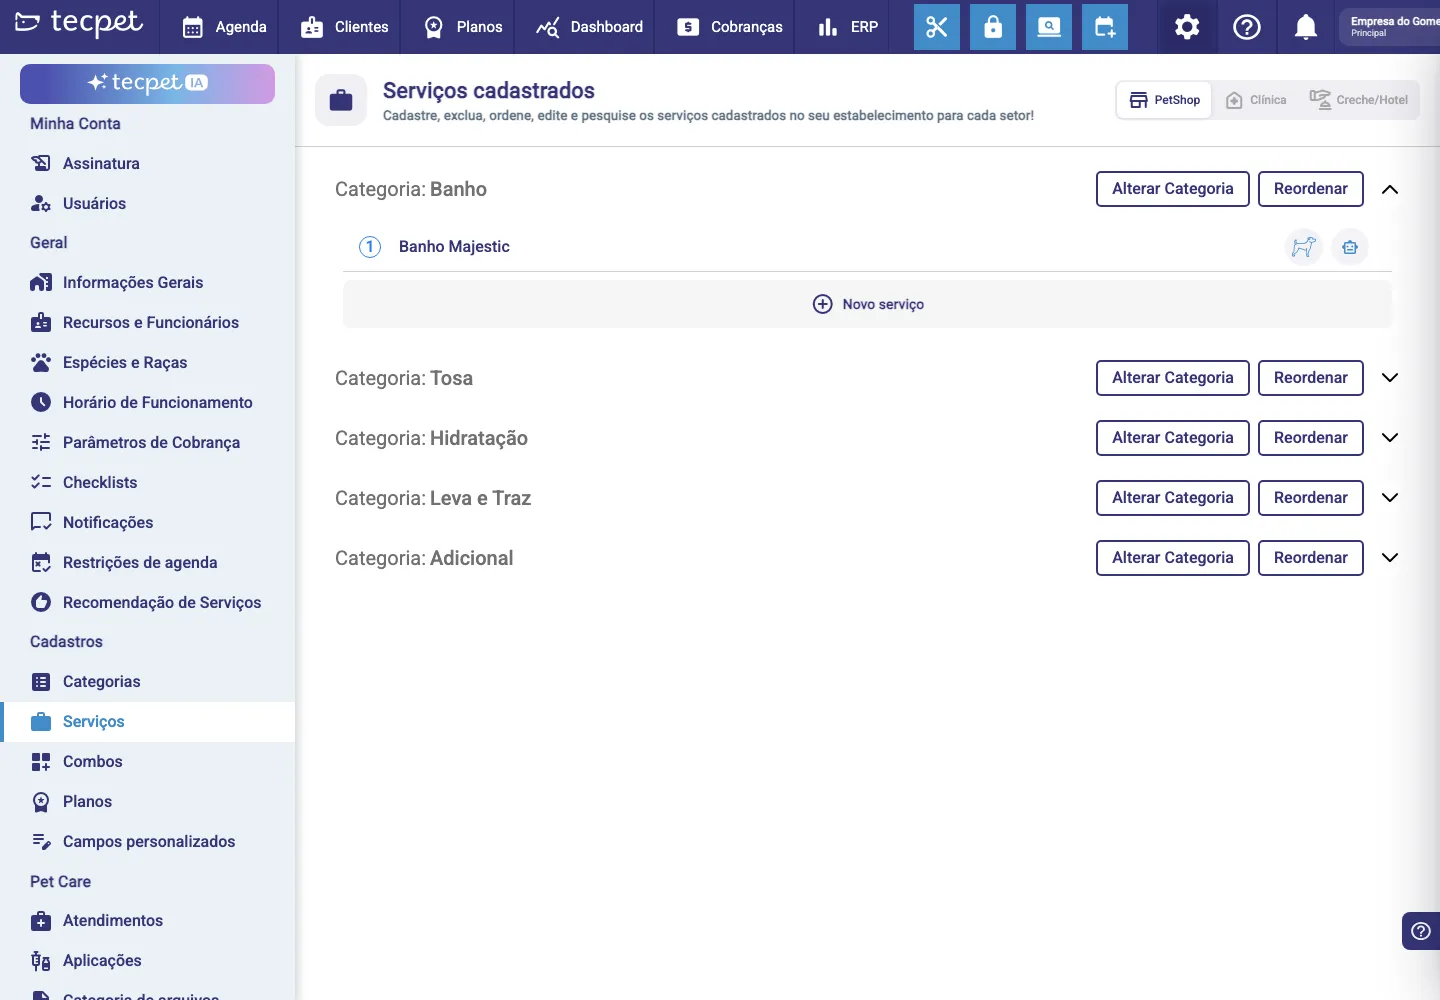
Section titled “Step 2: Open the category and click New service”Click the category bar where the service belongs (e.g. Bath) to expand it. You’ll see:
- the services already registered, in order, each with its position number, the name, the icons of the served species and, when the service is flagged for the AI, a robot icon (hover it and Offered by PetBot appears);
- a Search Service bar, which only shows up when the category has more than one service;
- at the end of the list, the ⊕ New service button.
Click ⊕ New service to open the form.
Step 3: Fill in the service data
Section titled “Step 3: Fill in the service data”The modal opens with the title New service. Fill it in, top to bottom:
- Service name*: how the service shows on the calendar, on the invoice and to the customer. There’s a character limit, displayed below the field as you type (e.g.
12/60). With no name, Save stays blocked. - Show on PetBot: Yes or No (on-screen hint: “Defines whether this service will be offered by PetBot”). It starts on Yes. On No, the service keeps working normally at the counter and on the calendar, but the WhatsApp AI stops offering it.
- Served species: checkboxes with each species’ icon (Dog, Cat, Rodent, Bird, Fish, Reptile…). The list only shows the species registered in your store, under Species and breeds. Tick every species that can receive this service.
- Default commission (%): the commission percentage for the professional who performs the service. Accepts 0 to 100 and starts at 0. This field only appears if the Commissions panel is enabled on your account; if you can’t see it, commissions aren’t turned on for the store.
- Category*: the service’s category, shown as a coloured tag. It comes pre-filled with the category you opened in Step 2, but you can change it right here.
- Service description: free text, aimed at the customer. It’s what the AI uses to explain the service on WhatsApp.
- Service guidance: free text, aimed at the team (care instructions, products, how to do it). It’s an internal note.
Step 4: Set the price and the duration
Section titled “Step 4: Set the price and the duration”Right below comes the pricing. Its format depends on your store’s billing mode: by size & coat or by breed, set under Billing parameters. Pick your case in the selector at the top of the article.
Your store charges by size & coat. You’ll see:
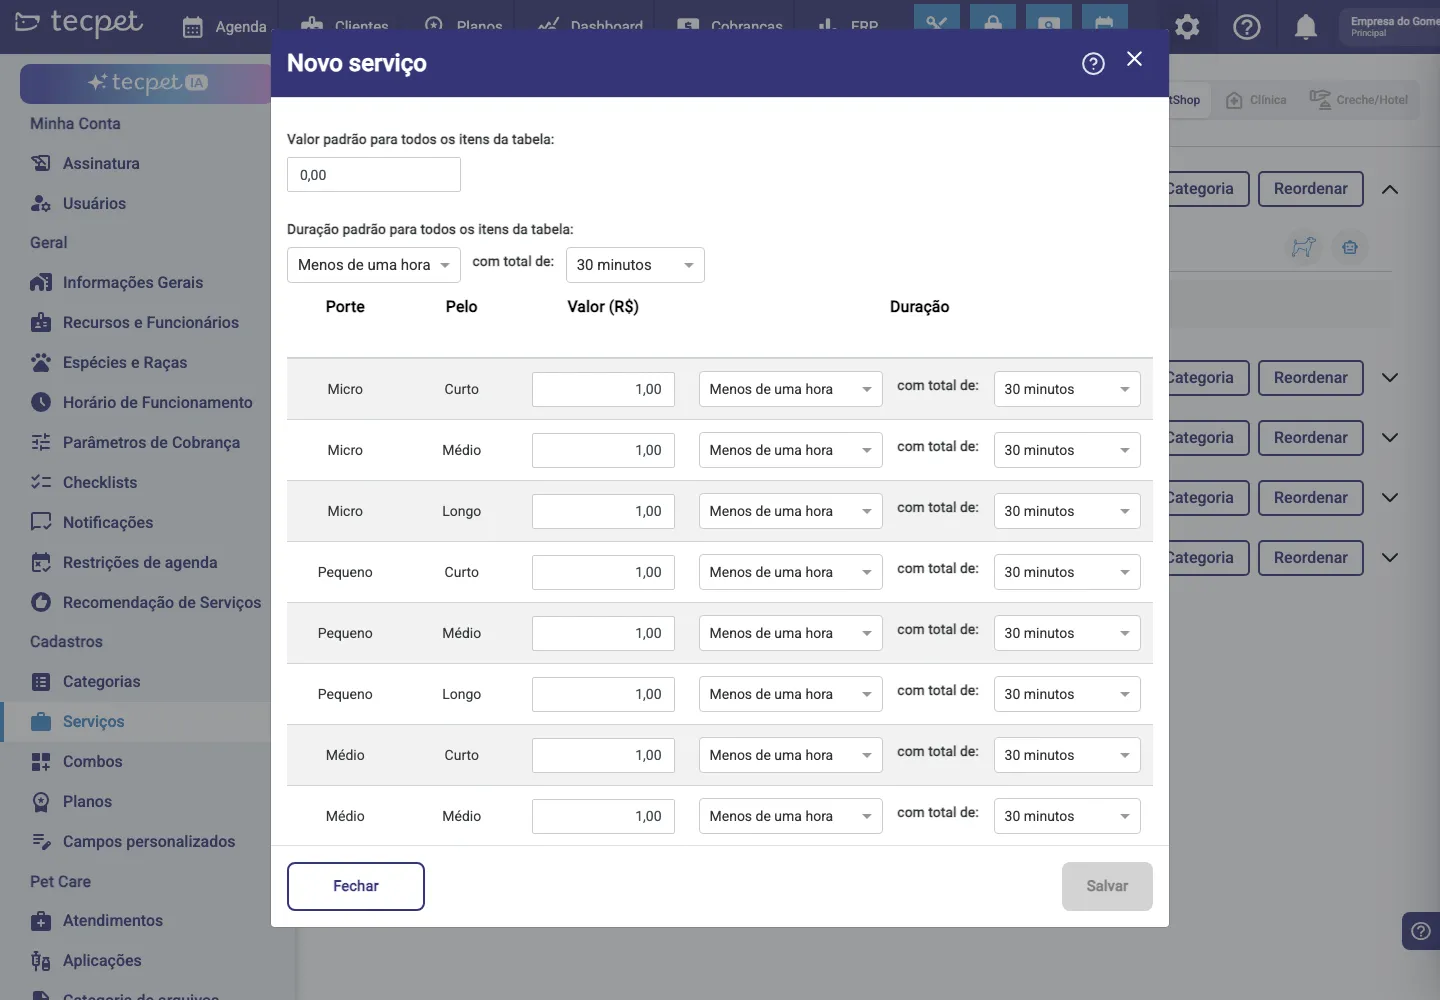
- Default value for all table items: a currency field. Once filled, the value is copied into every row of the table below.
- Default duration for all table items: two selectors side by side: the hours (e.g. Less than one hour) and the minutes (e.g. 30 minutes), separated by the text with a total of:. It is also copied into every row.
- The table, with the columns Size, Coat, Value (R$) and Duration. There is one row for each combination of size (Micro, Small, Medium, Big, Giant) and coat (Short, Medium, Long), the names come from your Billing parameters. The table already comes filled with 1.00 and 30 minutes; adjust row by row whatever differs.
By breed
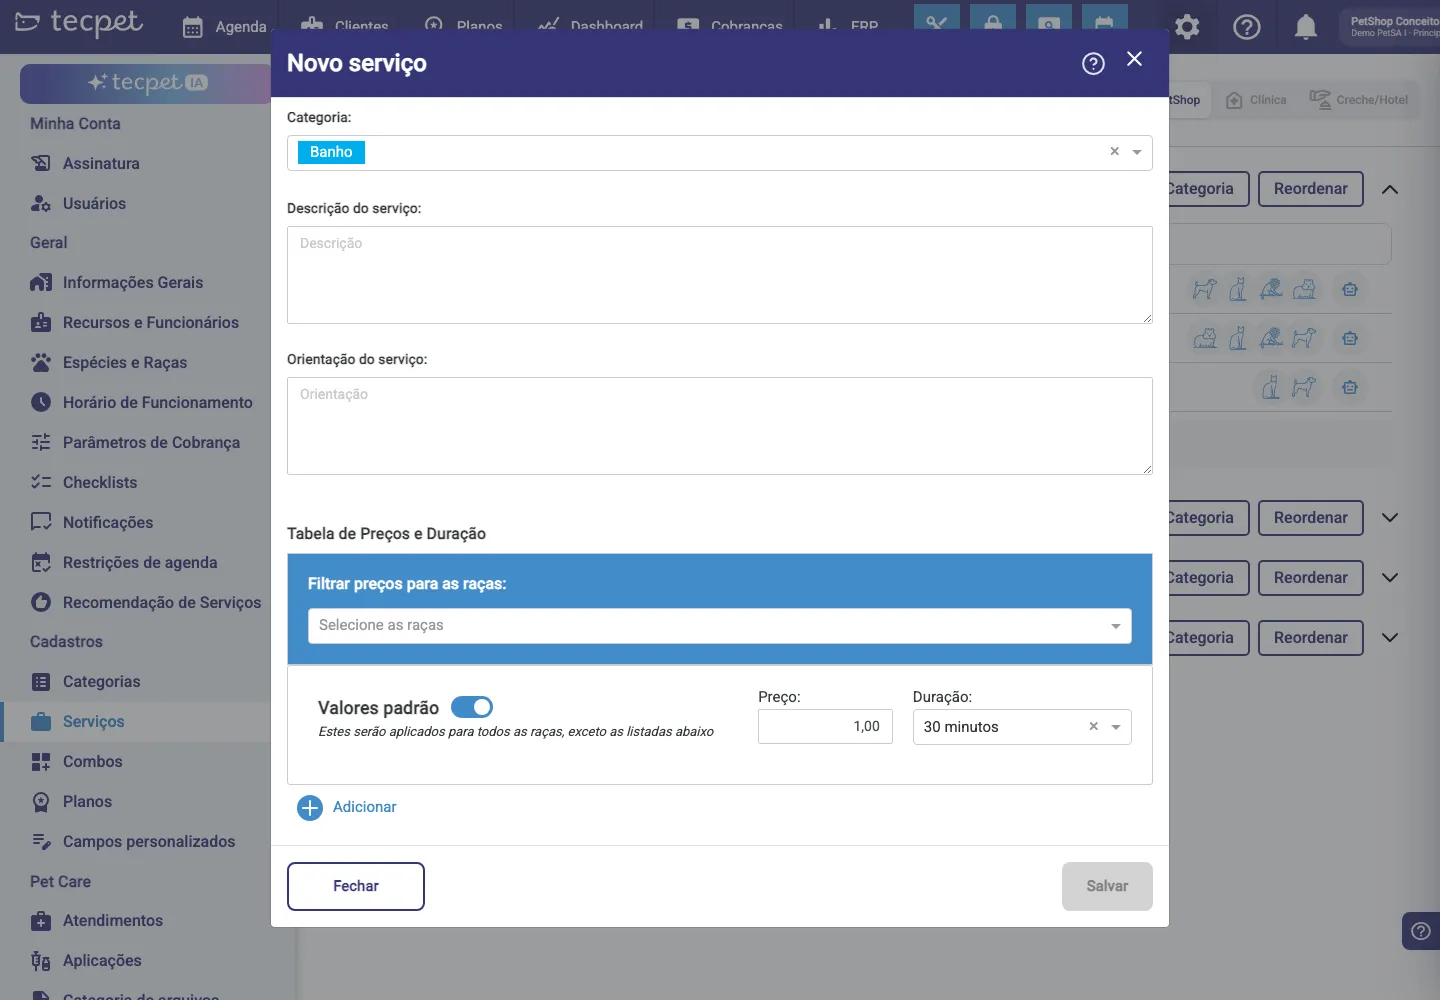
Your store charges by breed. Instead of the size table, the Price and Duration table block appears:
- Filter prices for the breeds (blue bar, Select the breeds field), it is for viewing only: picking one or more breeds narrows the list below to them. It sets no price.
- Default values: a block with an on/off switch:
- On (default): Price and Duration appear, with the notice “These will be applied to all breeds, except the ones listed below”. That is, it’s the base price valid for any breed.
- Off: Price and Duration disappear and the notice becomes “The service will only be offered for breeds with a specific price registered below”, the service then exists only for the breeds you list.
- ⊕ Add: creates an exception block with Selected breeds (you can pick several), Price, Duration (Select the duration) and a bin to delete the block. Repeat for each different price.
Step 5: Save
Section titled “Step 5: Save”Click Save (bottom right corner). If Close is clicked first, nothing is recorded.
The service now appears inside the chosen category, at the end of the list, and can already be used in appointments, sales and combos.
Extra fields in the Daycare/Hotel segment
Section titled “Extra fields in the Daycare/Hotel segment”On the Daycare/Hotel tab the service is configured per period. After Category you’ll see the buttons Morning, Afternoon and Full day; click one of them to configure that period:
- Enable period (Yes), turns the period on. While it’s off, the remaining fields stay hidden.
- Capacity: how many pets fit in that period.
- Check-in time and Check-out time: the default arrival and departure times.
- Days of the week: on which days this period runs.
- Default value for all table items, Service description and Service guidance: these are specific to each period, meaning you can have different text and value for Morning, Afternoon and Full day.
On this tab the price table has no Duration column: the time is defined by the period’s check-in/check-out pair. Repeat the setup for every period your store offers and only then click Save.
Edit, clone, remove, reorder and move between categories
Section titled “Edit, clone, remove, reorder and move between categories”- Edit: in the list, click anywhere on the service’s row. The modal opens as Edit service name, with the same fields filled in. Change what you need and click Save.
- Clone: inside the edit modal, the Clone button asks for confirmation (“Clone name? A new service will be created with the name: Copy - name”) and creates a copy with the whole price table. It’s the fastest way to create similar variations.
- Remove: also in the edit modal. It asks for confirmation: “Remove name? This cannot be undone”.
- Reorder: on the category bar, click Reorder. The buttons become Sort A-Z, Cancel and Save, and each row gains a drag handle. Drag (or use Sort A-Z) and click Save. This is the order in which the service appears to you and to the customer.
- Change Category: also on the category bar. Pick the New Category in the selector, tick the services that should move and confirm.