
What integrations are
The Integrations screen is the panel where you see which external systems your shop is connected to. Each ERP shows up as a card with its logo, the status (Enabled/Disabled), the direction of the data exchange (Two-way/One-way) and the list of what it syncs. From here you open See details (what will and won’t sync) and Configure: the ERP form that used to live in the old “ERP” settings tab. What you set here directly affects customer records, invoices and tax document issuing.
How many times do you type the same client every day? #

Stop typing everything twice
Every client entered twice is wasted time and an invoice that comes back wrong.
“The right data is created once and flows on its own all the way to the invoice.”
You register the client in tecpet, then retype everything into your ERP to issue the invoice. In the rush, someone swaps a tax ID, skips the address, duplicates a record, and the invoice fails right when you need to bill.
With the integration active, tecpet talks to your ERP: the client record syncs, the fiscal and financial side is built from the invoice, and the tax document goes out automatically when you bill. In two-way integrations, like VHSYS, counter sales and payments flow back into tecpet, keeping both sides identical.
Step 1: Open the Integrations screen
Section titled “Step 1: Open the Integrations screen”Go to Settings (the gear icon at the top) and, in the left-hand menu, under the System section, click Integrations. Because it’s a Settings screen, the system asks for the administrator password before opening it.
At the top you see the title Integrations with the line “Connect tecpet to other systems and sync your data automatically.” and, right below it, a blue banner explaining that “Turning an integration on is done by our team”, with the green Talk to Sales button (it opens a WhatsApp chat with tecpet).
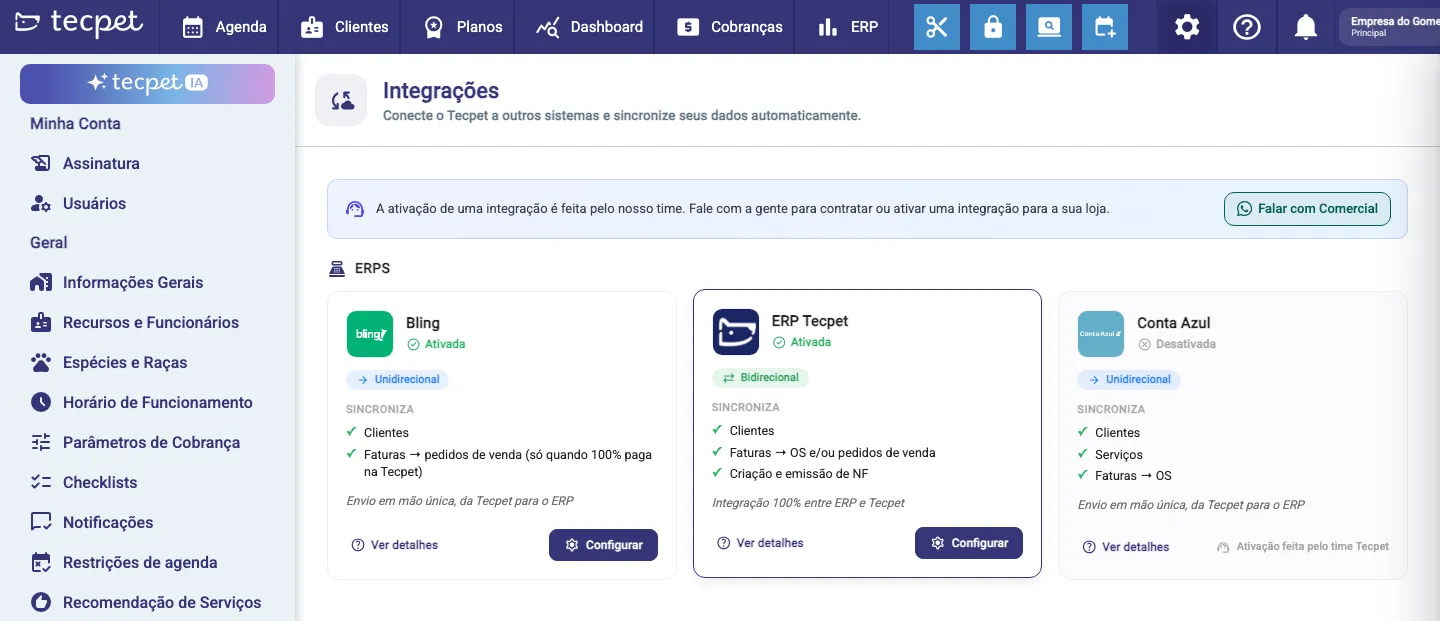
There is a single category on the screen: ERPS. All cards live there.
Step 2: Read your ERP’s card
Section titled “Step 2: Read your ERP’s card”Each card summarises one integration. Here’s what every part means:
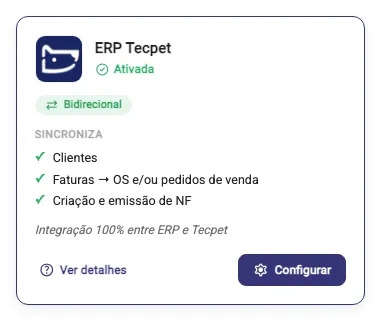
- Logo and name: the name of the system. If your shop uses the tecpet-branded version of the ERP, the VHSYS card shows up as ERP tecpet with tecpet’s dark blue logo instead of Vhsys. It’s the same integration, just re-branded.
- Status: next to the name: Enabled (green, with ✓) or Disabled (grey, with ✗).
- Direction: the pill under the name:
- Two-way: data goes back and forth between tecpet and the ERP;
- One-way: data is only pushed from tecpet to the ERP.
- SYNCS: the short list of what that system exchanges with tecpet.
- Note: the italic line at the bottom of the list (“100% integration between the ERP and tecpet” or “One-way sending, from tecpet to the ERP”).
- See details: always present; opens the modal with what will and won’t sync.
- Configure: the dark button. It only shows up when the integration is Enabled and has its own form (today: Vhsys/ERP tecpet and Bling).
- Enabled by the tecpet team: the text that replaces the button when the integration is Disabled.
You can click the whole card to open the details, no need to hit the link exactly.
The card order changes
Section titled “The card order changes”Cards don’t stay in fixed positions. The screen sorts them like this: Enabled integrations first, then ERP tecpet, and finally the rest in alphabetical order. In practice, what is turned on for your shop shows up first: if the tecpet team enables a new ERP, it moves to the front.
The cards on the screen
Section titled “The cards on the screen”| Card | Direction | Syncs | Has “Configure”? |
|---|---|---|---|
| Vhsys (or ERP tecpet) | Two-way | Customers · Invoices → service orders and/or sales orders · Tax document creation and issuing | Yes, when enabled |
| Bling | One-way | Customers · Invoices → sales orders (only when 100% paid in tecpet) | Yes, when enabled |
Step 3: Open “See details” and check what’s in and what’s out
Section titled “Step 3: Open “See details” and check what’s in and what’s out”Click the card (or See details) to open that ERP’s Q&A modal. The purple header repeats the logo, name and status; right below come the direction pill and the note. Then, in this order: Will sync (green ✓), Won’t sync (red ✗) and How to enable (🚀).
The body of the modal scrolls: the list is long, so scroll to the end. To close it, use the X in the top right corner. The footer always shows Talk to Sales and, when the integration is enabled and configurable, Configure integration.
Vhsys / ERP tecpet
Section titled “Vhsys / ERP tecpet”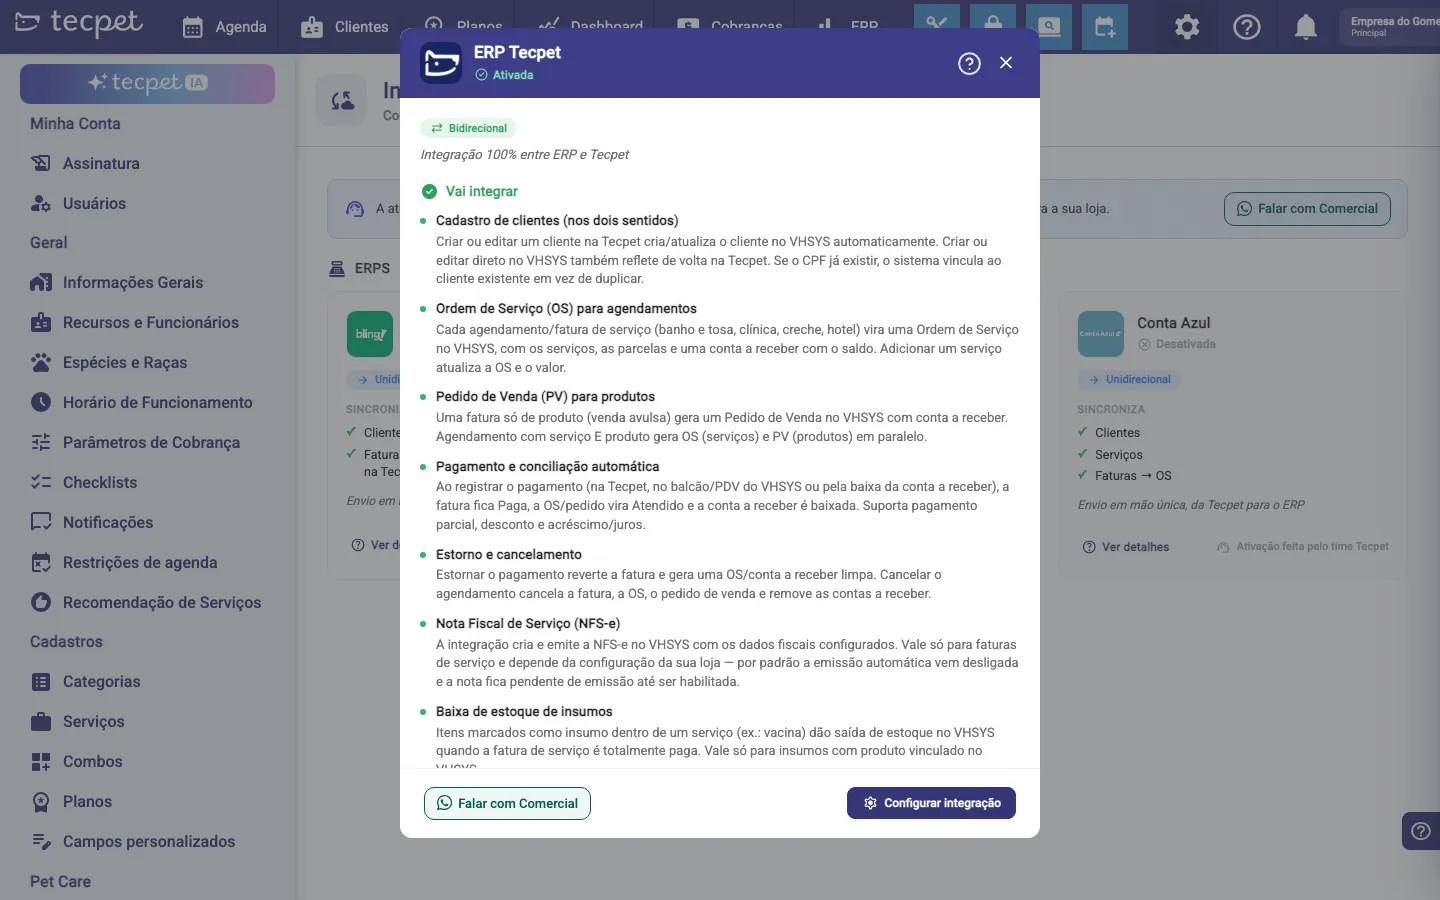
Will sync:
- Customer records (both ways): creating or editing a customer in tecpet creates/updates the customer in VHSYS, and the other way around too. If the tax ID already exists, the system links to the existing customer instead of duplicating it.
- Service Order (SO) for bookings: every service invoice (grooming, clinic, daycare, hotel) becomes a Service Order in VHSYS, with the services, the instalments and a receivable holding the balance. Adding a service updates the SO and its amount.
- Sales Order (SaO) for products: a product-only invoice creates a Sales Order with a receivable. A booking with a service and a product creates an SO (services) and a SaO (products) side by side.
- Payment and automatic reconciliation: when you register the payment (in tecpet, at the VHSYS counter/POS or by settling the receivable), the invoice becomes Paid, the SO/order becomes Fulfilled and the receivable is settled. Partial payment, discount and surcharge/interest are supported.
- Refund and cancellation: refunding the payment reverses the invoice and creates a clean SO/receivable. Cancelling the booking cancels the invoice, the SO, the sales order and removes the receivables.
- Service tax document (NFS-e): the integration creates and issues the NFS-e using the tax data you configured. It applies to service invoices only and depends on your shop’s setup: automatic issuing is off by default and the document stays pending until it is turned on.
- Stock write-off for consumables: items flagged as consumables inside a service (e.g. a vaccine) leave stock in VHSYS when the service invoice is fully paid. Only applies to consumables linked to a product in VHSYS.
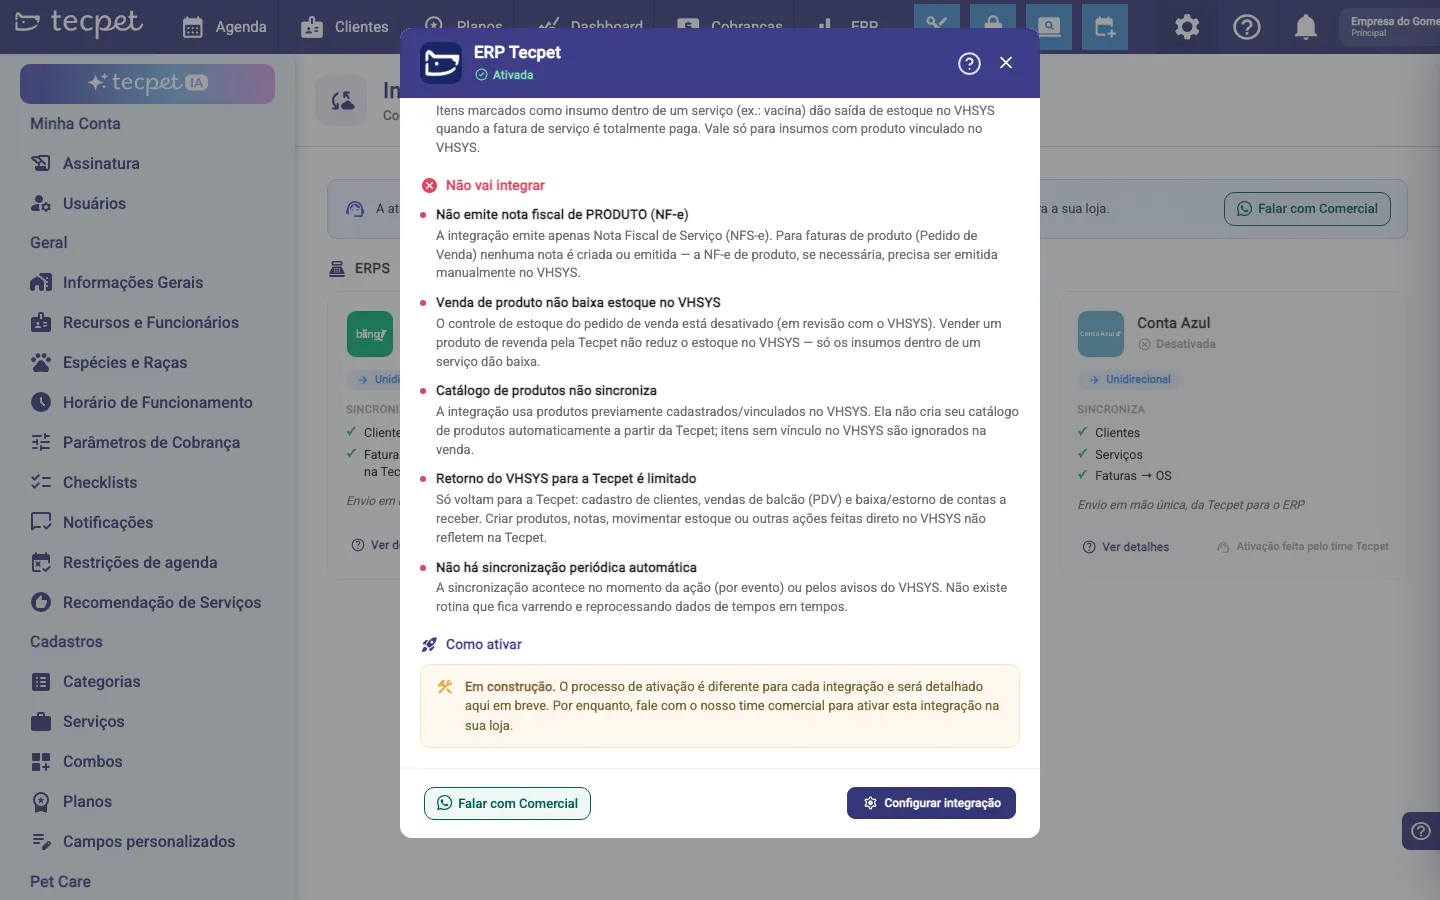
Won’t sync:
- No PRODUCT tax document (NF-e): only the service tax document (NFS-e) goes out. Product invoices generate no tax document; the NF-e, if needed, is issued manually in VHSYS.
- Selling a product doesn’t reduce stock in VHSYS: stock control on the sales order is turned off. Only consumables inside a service write stock off.
- The product catalogue doesn’t sync: the integration uses products already registered/linked in VHSYS; items without a link are ignored in the sale.
- What comes back from VHSYS to tecpet is limited: only customer records, counter (POS) sales and receivable settlement/refunds come back. Creating products, tax documents or moving stock directly in VHSYS is not reflected in tecpet.
- There’s no scheduled automatic sync: the exchange happens at the moment of the action; there’s no routine sweeping and reprocessing data every so often.
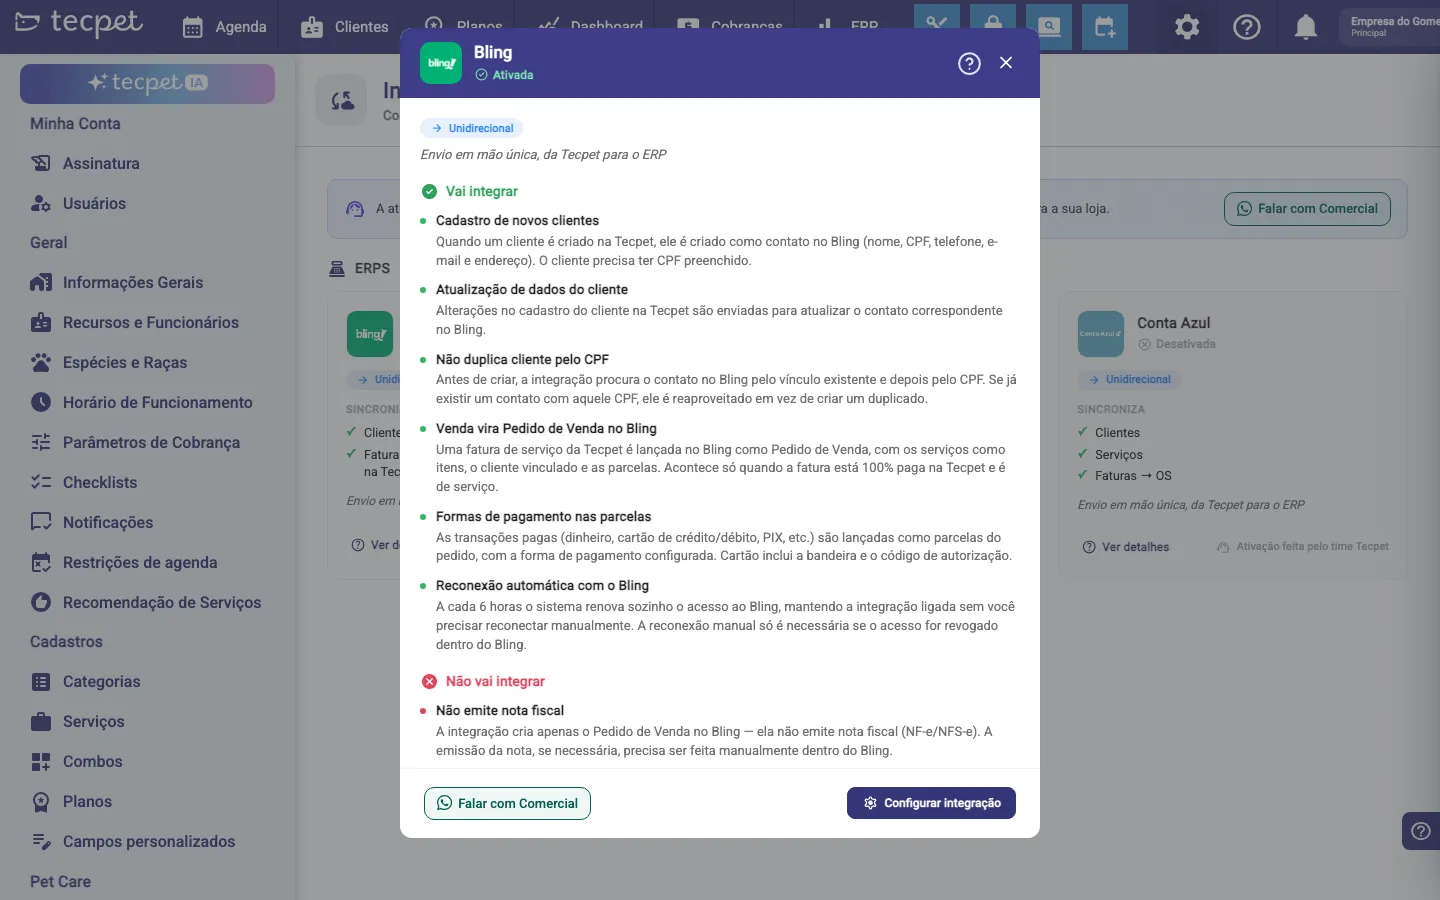
Will sync:
- New customer records: a customer created in tecpet becomes a contact in Bling (name, tax ID, phone, e-mail and address). The customer must have a tax ID filled in.
- Customer data updates: changes to the record in tecpet are sent to update the matching contact in Bling.
- No duplicate customers by tax ID: before creating one, the integration looks for the contact by the existing link and then by tax ID; if it already exists, it is reused.
- A sale becomes a Sales Order in Bling: the service invoice is posted as a Sales Order, with the services as items, the customer linked and the instalments. Only when the invoice is 100% paid in tecpet and is a service invoice.
- Payment methods on the instalments: cash, credit/debit card, PIX and so on become instalments on the order with the configured payment method. Cards include the brand and the authorisation code.
- Automatic reconnection to Bling: every 6 hours the system renews access on its own. You only have to reconnect manually if access is revoked inside Bling.
Won’t sync:
- No tax document is issued: it only creates the Sales Order; the tax document (NF-e/NFS-e) is issued manually in Bling.
- No products or stock sync: only services go into the order; product-only invoices are ignored.
- A partial payment produces nothing: until the invoice is 100% paid, nothing is sent to Bling.
- Cancellation and refunds are not reflected in Bling: the Sales Order already created stays as it is and has to be adjusted by hand.
- Customers are never deleted or deactivated: deleting a customer in tecpet does not delete the contact in Bling.
- Nothing is pulled from Bling into tecpet: anything registered or sold inside Bling does not come back to tecpet.
- A customer with no tax ID doesn’t sync: the send is blocked and flagged as a failure, with a warning to review the record.
How to enable
Section titled “How to enable”This section appears in every modal and today carries a yellow notice: “Under construction. The activation process differs for each integration and will be detailed here soon. For now, talk to our sales team to enable this integration for your shop.”
Step 4: Configure the active integration
Section titled “Step 4: Configure the active integration”With the integration Enabled and configurable, click Configure (on the card) or Configure integration (in the details modal footer). The ERP tecpet settings form opens (or Vhsys settings / Bling settings, depending on the card name).
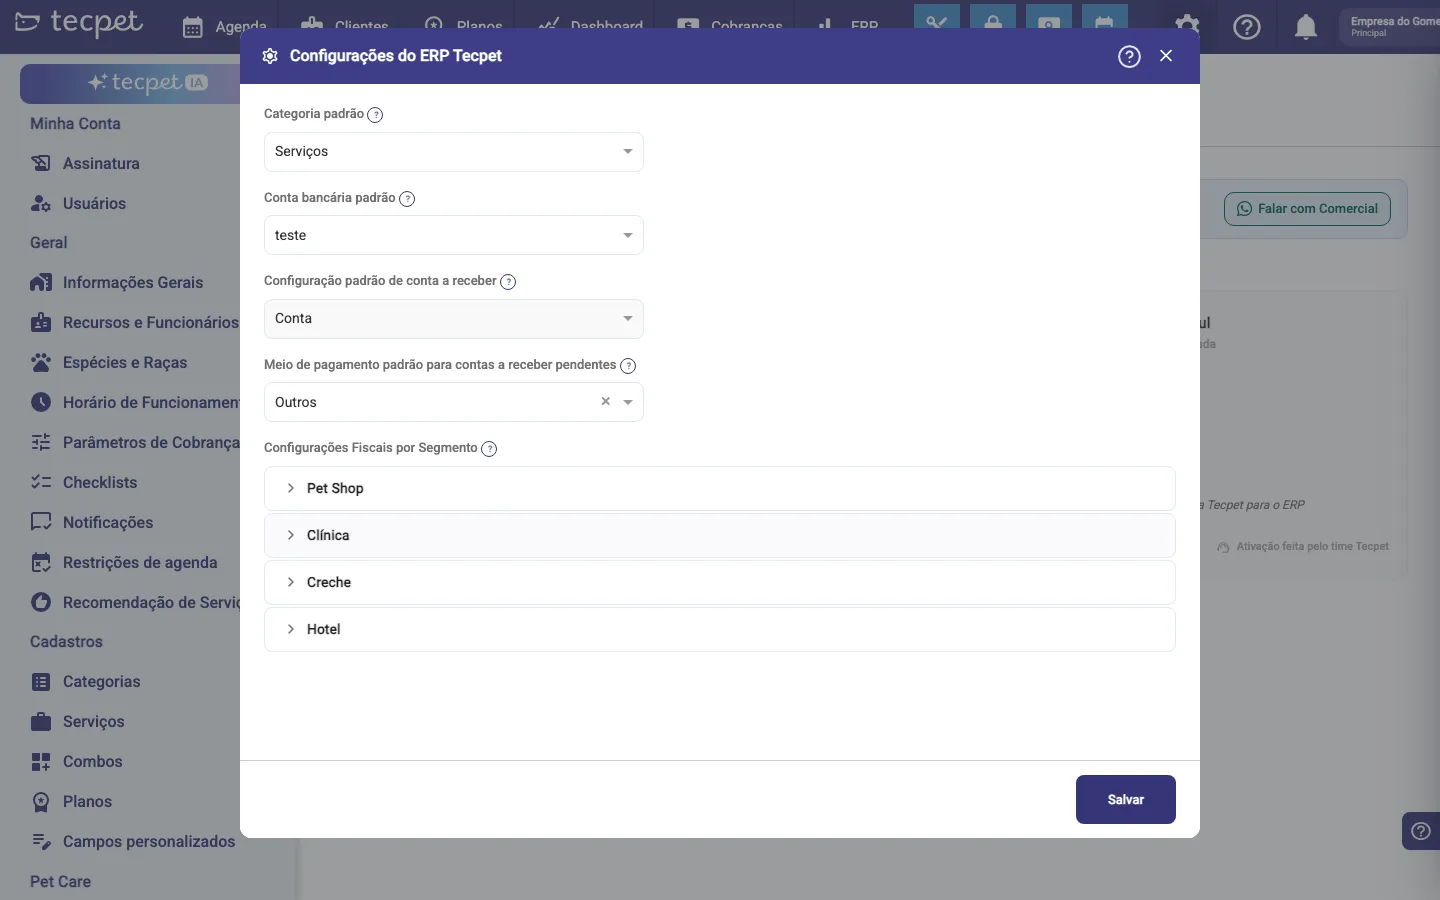
Vhsys / ERP tecpet fields:
- Default category: the ERP category the services performed on the schedule are posted to. Suggested value: Services.
- Default bank account: the ERP account used for open receivables (not yet paid).
- Default receivable setup: how the charge is created in the ERP. The default is Account; only switch to bank slip if the ERP bank account is set up to issue bank slips.
- Default payment method for pending receivables: the payment method recorded when pending receivables are created. It makes settling straight from the ERP’s receivables easier. It can be left empty (None (default)).
- Tax settings by segment: the expandable rows Pet Shop, Clinic, Daycare and Hotel. Open each one and fill in the data used to create the Service Orders and the tax documents of that segment.
Click Save in the footer to store the changes.
Bling has a different form, with: Additional information, Store (Bling), Category, Status, Service codes, Additional tax document data, Tax segments (Pet Shop, Clinic, Daycare, Hotel and Product) and Payment methods (PIX, Cash, Bank slip, Bank transfer, Voucher, Other, Credit card and Debit card), here you say which Bling payment method matches each tecpet one.
Step 5: Ask for an integration to be enabled
Section titled “Step 5: Ask for an integration to be enabled”You can’t turn an integration on by yourself from the panel: it’s done by the tecpet team, using your ERP credentials. Click Talk to Sales: in the blue banner at the top of the screen or in the details modal footer, and the chat opens on WhatsApp already carrying a message about the integration you were looking at.
When the screen doesn’t load
Section titled “When the screen doesn’t load”While it fetches the data, the screen shows Loading integrations…. If the fetch fails, you get the crossed-out cloud icon with the message “We couldn’t load your integrations. Check your connection and try again.” plus a Try again button, and a red warning in the corner.
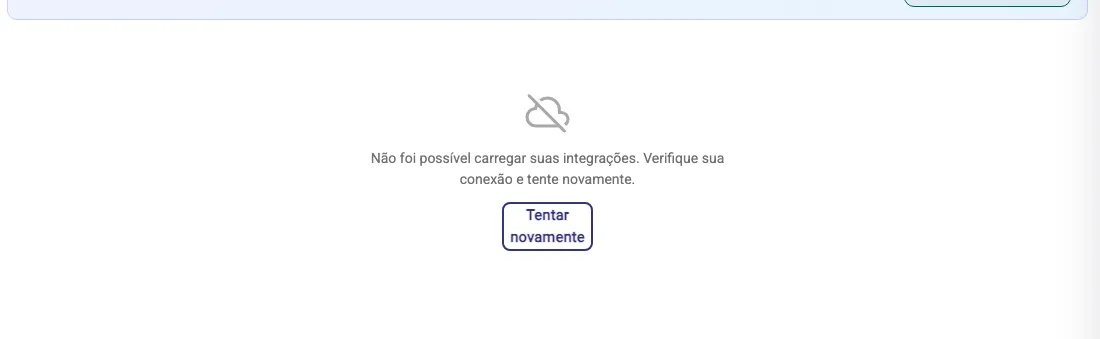
Try again reloads just the list, without leaving the screen or asking for the administrator password again. If it keeps failing, check your connection and then contact support.
How to change it later
Section titled “How to change it later”- Change a setting: go back to Settings → System → Integrations, click Configure on the ERP card, adjust the fields and click Save. It applies from the next sends onwards.
- Turn an ERP off or switch ERPs: there’s no button for that on the screen; ask through Talk to Sales.
- Looking for the old “ERP” settings tab?: it’s gone: the form became the Configure modal on this screen. Old links and bookmarks land right here.