Understanding the Calendar
The Calendar is TecPet’s home screen and the heart of the day’s operation. It’s a board organized by status: each appointment is a card that moves left to right as the visit progresses. Here’s how to read each part.
Segment tabs and the day
Section titled “Segment tabs and the day”At the top are the segment tabs — Pet Shop, Clinic and Daycare/Hotel. Each shows the calendar for that service type (services and flow change with the segment). Next to them, the arrows and date change the day you’re viewing.
The layout changes with the segment: Pet Shop uses the status board (described below), while Clinic and Daycare/Hotel use a time grid — rows are the hours of the day and there’s one column per professional. This format is better for appointments and stays with a set time: each visit shows up at the right time and professional.

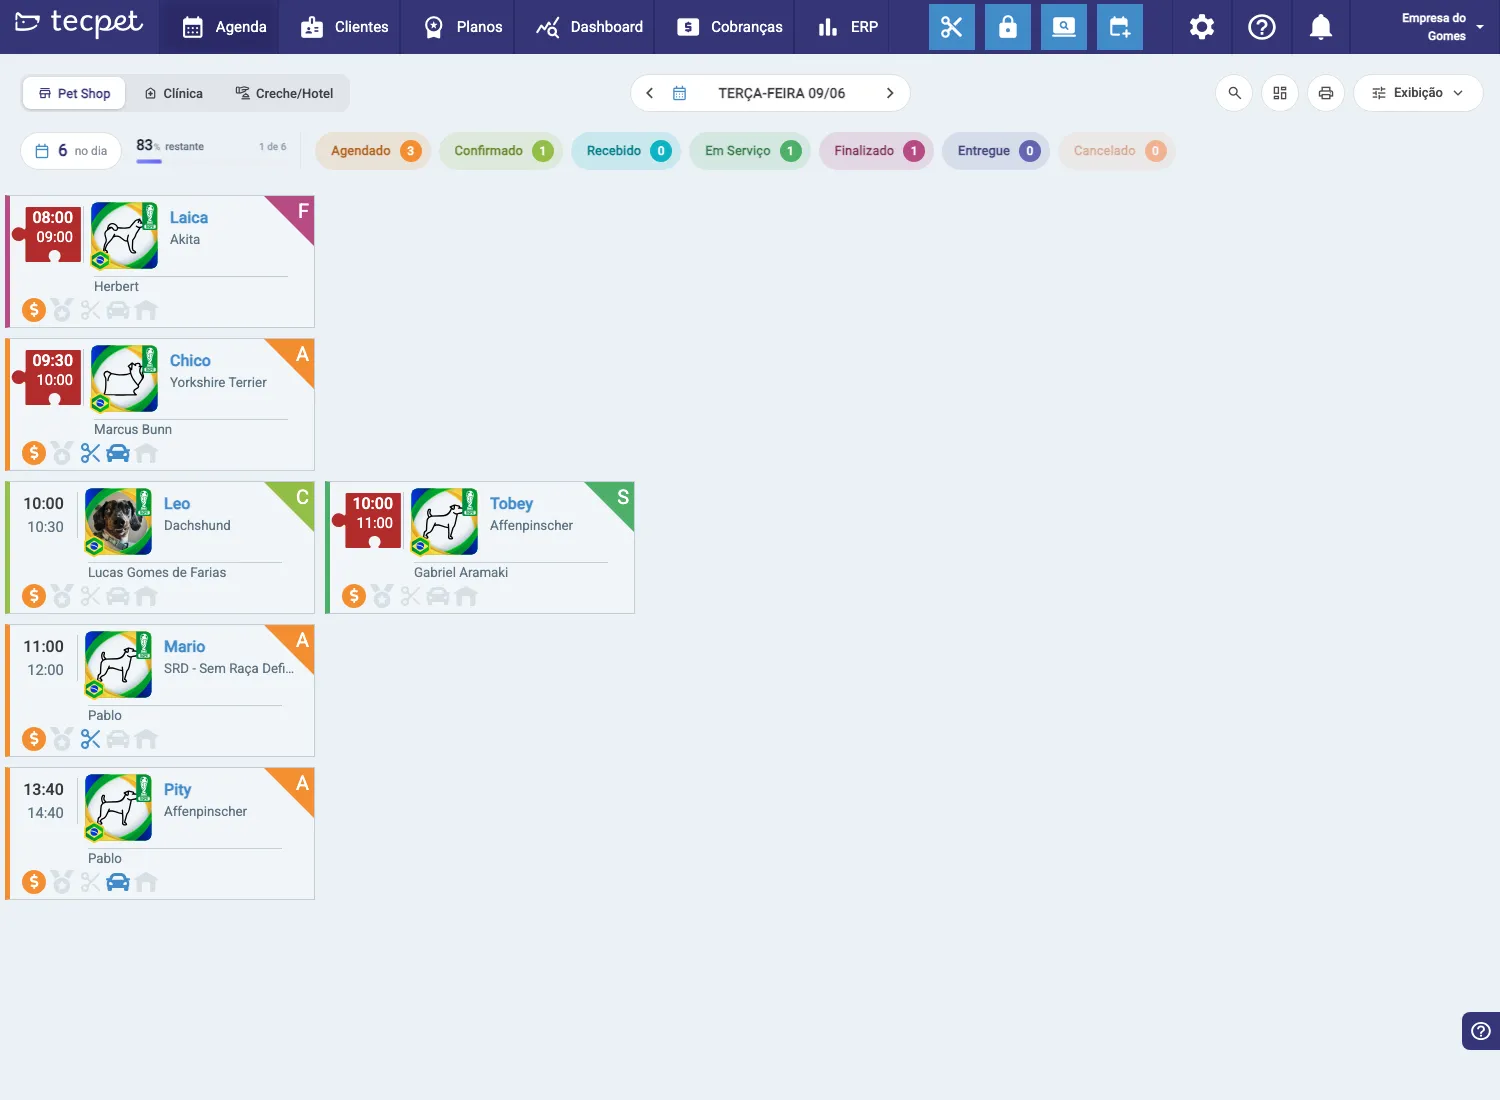
The status columns
Section titled “The status columns”Applies to Pet Shop. In Clinic and Daycare/Hotel the calendar is the time grid shown above.
Appointments are split by status, in flow order:
- Scheduled — booked, pet hasn’t arrived;
- Confirmed — the owner confirmed;
- Received — the pet arrived at the store;
- In Service — being served;
- Finished — the service is done;
- Delivered — the pet went back to the owner;
- Cancelled.
The number on each column shows how many appointments are in that status.
The appointment cards
Section titled “The appointment cards”Each card sums up the appointment: the time (in and out), the pet’s photo and name (with breed), the customer/professional and icons of the booked services (scissors = grooming, etc.).
The colored stripe on the side and the corner tag help you spot the card quickly. The ENCAIXE (squeeze-in) tag marks a visit that was fit in outside the normal time grid.
Searching the calendar
Section titled “Searching the calendar”The search bar (at the top) quickly finds an appointment for the day. Pick what to search by the buttons next to it — Customer, Pet or #ID (the appointment number) — and type. Next to the search are the shortcuts to switch the view (list/board), print the calendar and open Display.

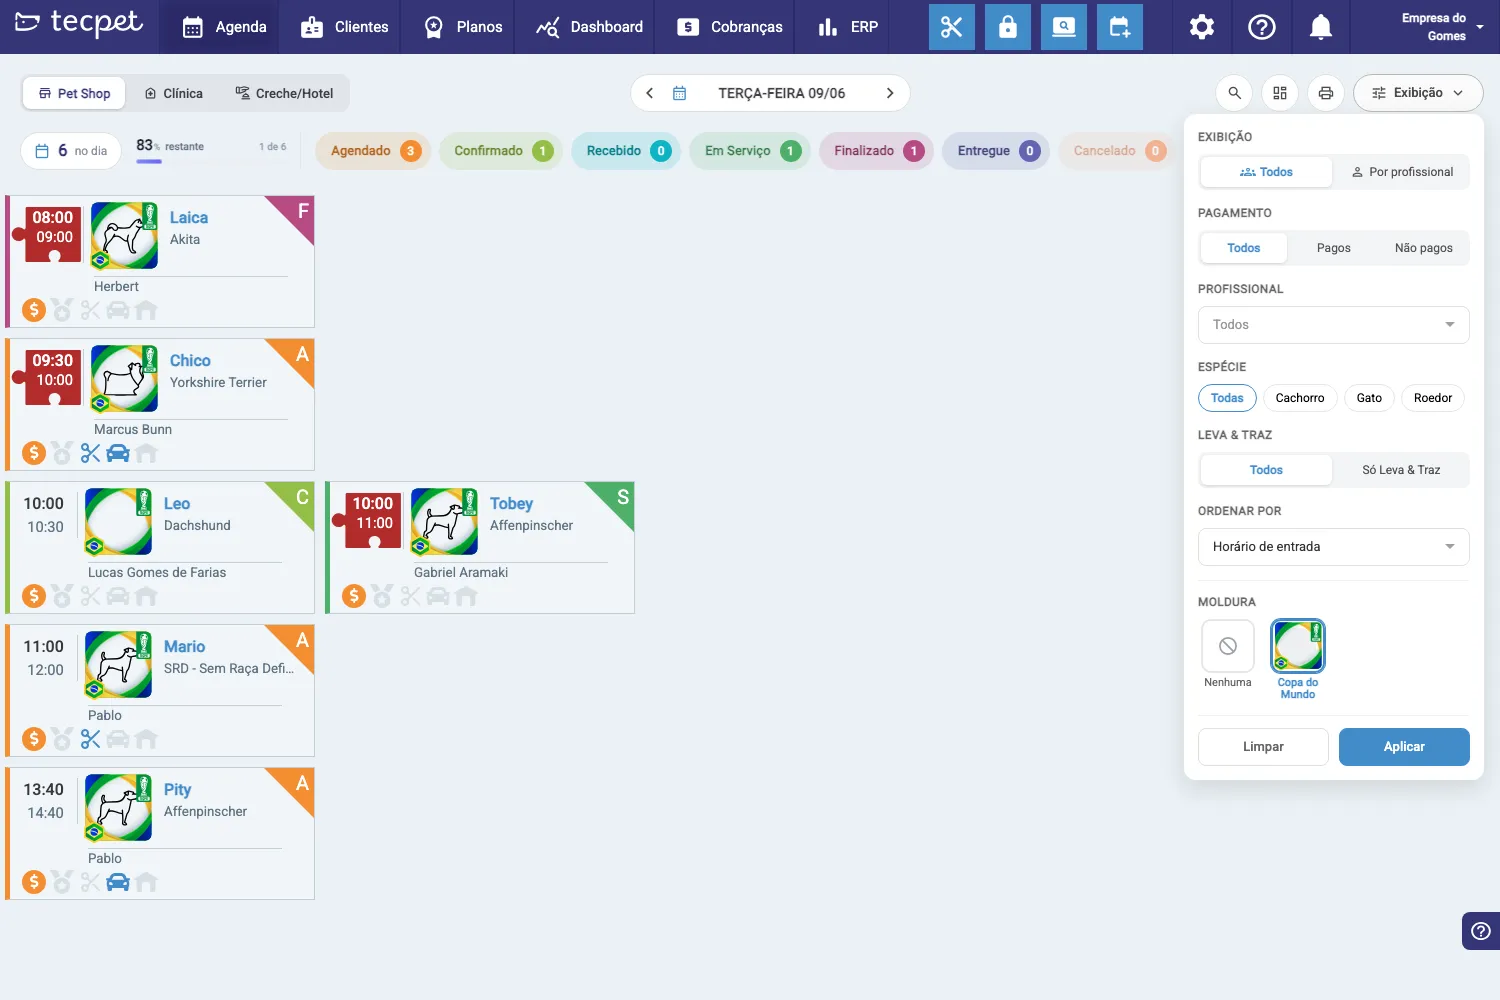
Display and filters
Section titled “Display and filters”The Display button (top-right) opens a panel to change the view and filter the calendar:
- Display: All or By professional (groups cards by staff member);
- Payment: All / Paid / Unpaid;
- Professional, Species (Dog/Cat/Rodent) and Pickup & delivery (only those with transport);
- Sort by (e.g. arrival time);
- Frame: an optional decoration on the cards (e.g. World Cup).
Click Apply to filter or Clear to reset.
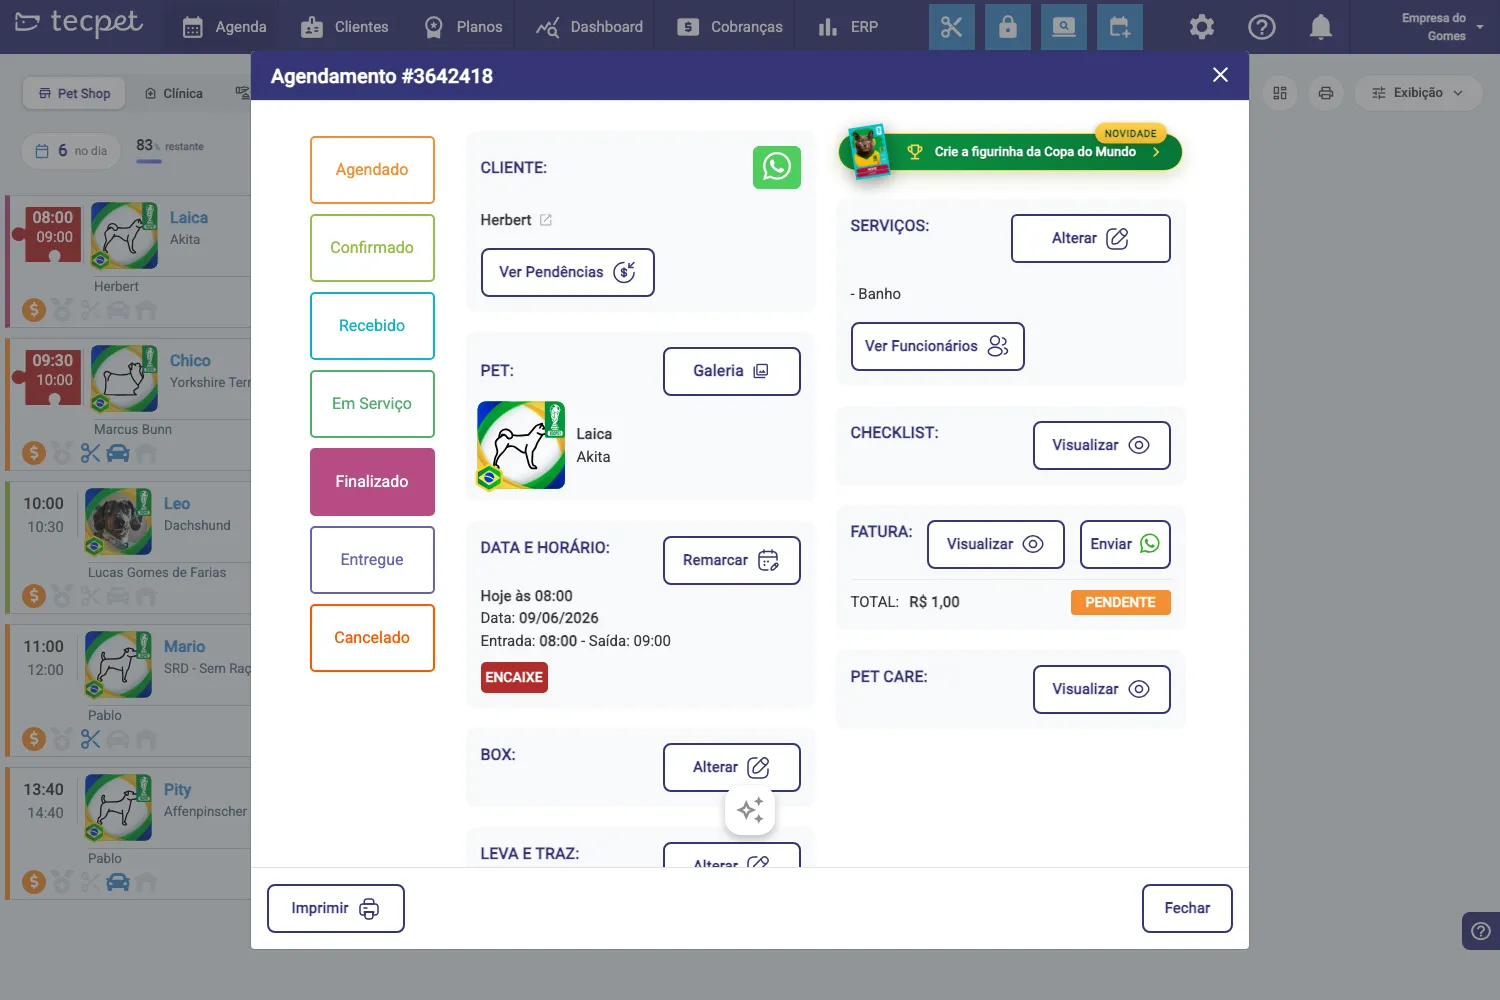
Clicking an appointment
Section titled “Clicking an appointment”Click a card to open the appointment details. In that window you:
- Change the status (the left column — Scheduled, Confirmed, Received…);
- see Customer and Pet (with WhatsApp, Pending items and Gallery shortcuts);
- Reschedule the date/time;
- Change the services, the box and pickup & delivery;
- see the Invoice (and send it), the Checklist and Pet Care;
- can Print the sheet.
This is where you run the visit from start to finish. (See Create an appointment for the booking.)