
Register a customer
The customer is the basis of everything in tecpet, pets, appointments, invoices and WhatsApp all link to them. You can register the customer with the pet together, on the same screen. Here’s the step by step.
Step 1: Open New Registration
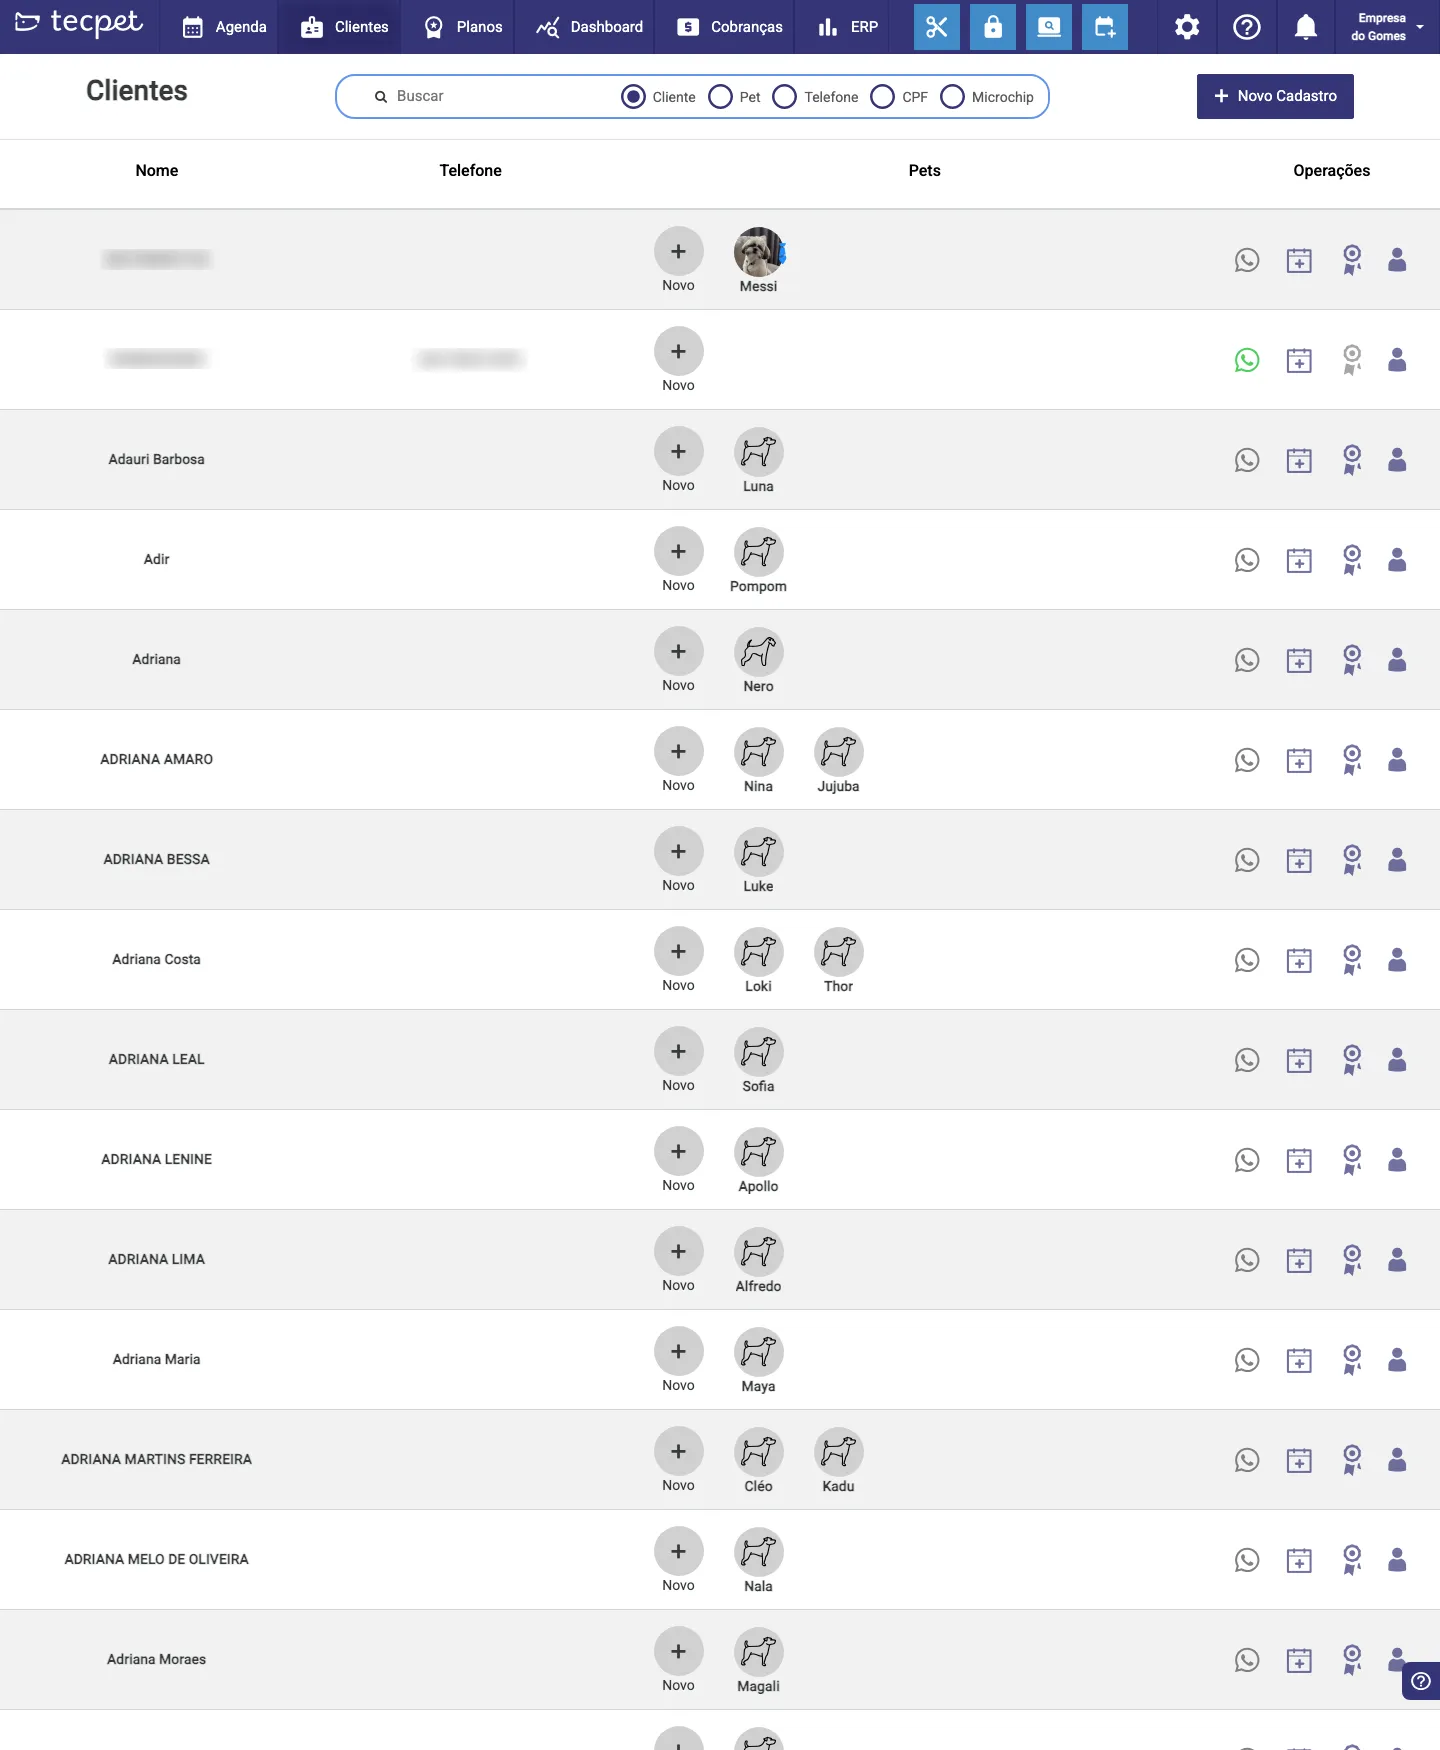
Section titled “Step 1: Open New Registration”In the top menu, click Customers and then the New Registration button (blue, top-right corner). The New Customer window opens.
Step 2: Fill in the general data
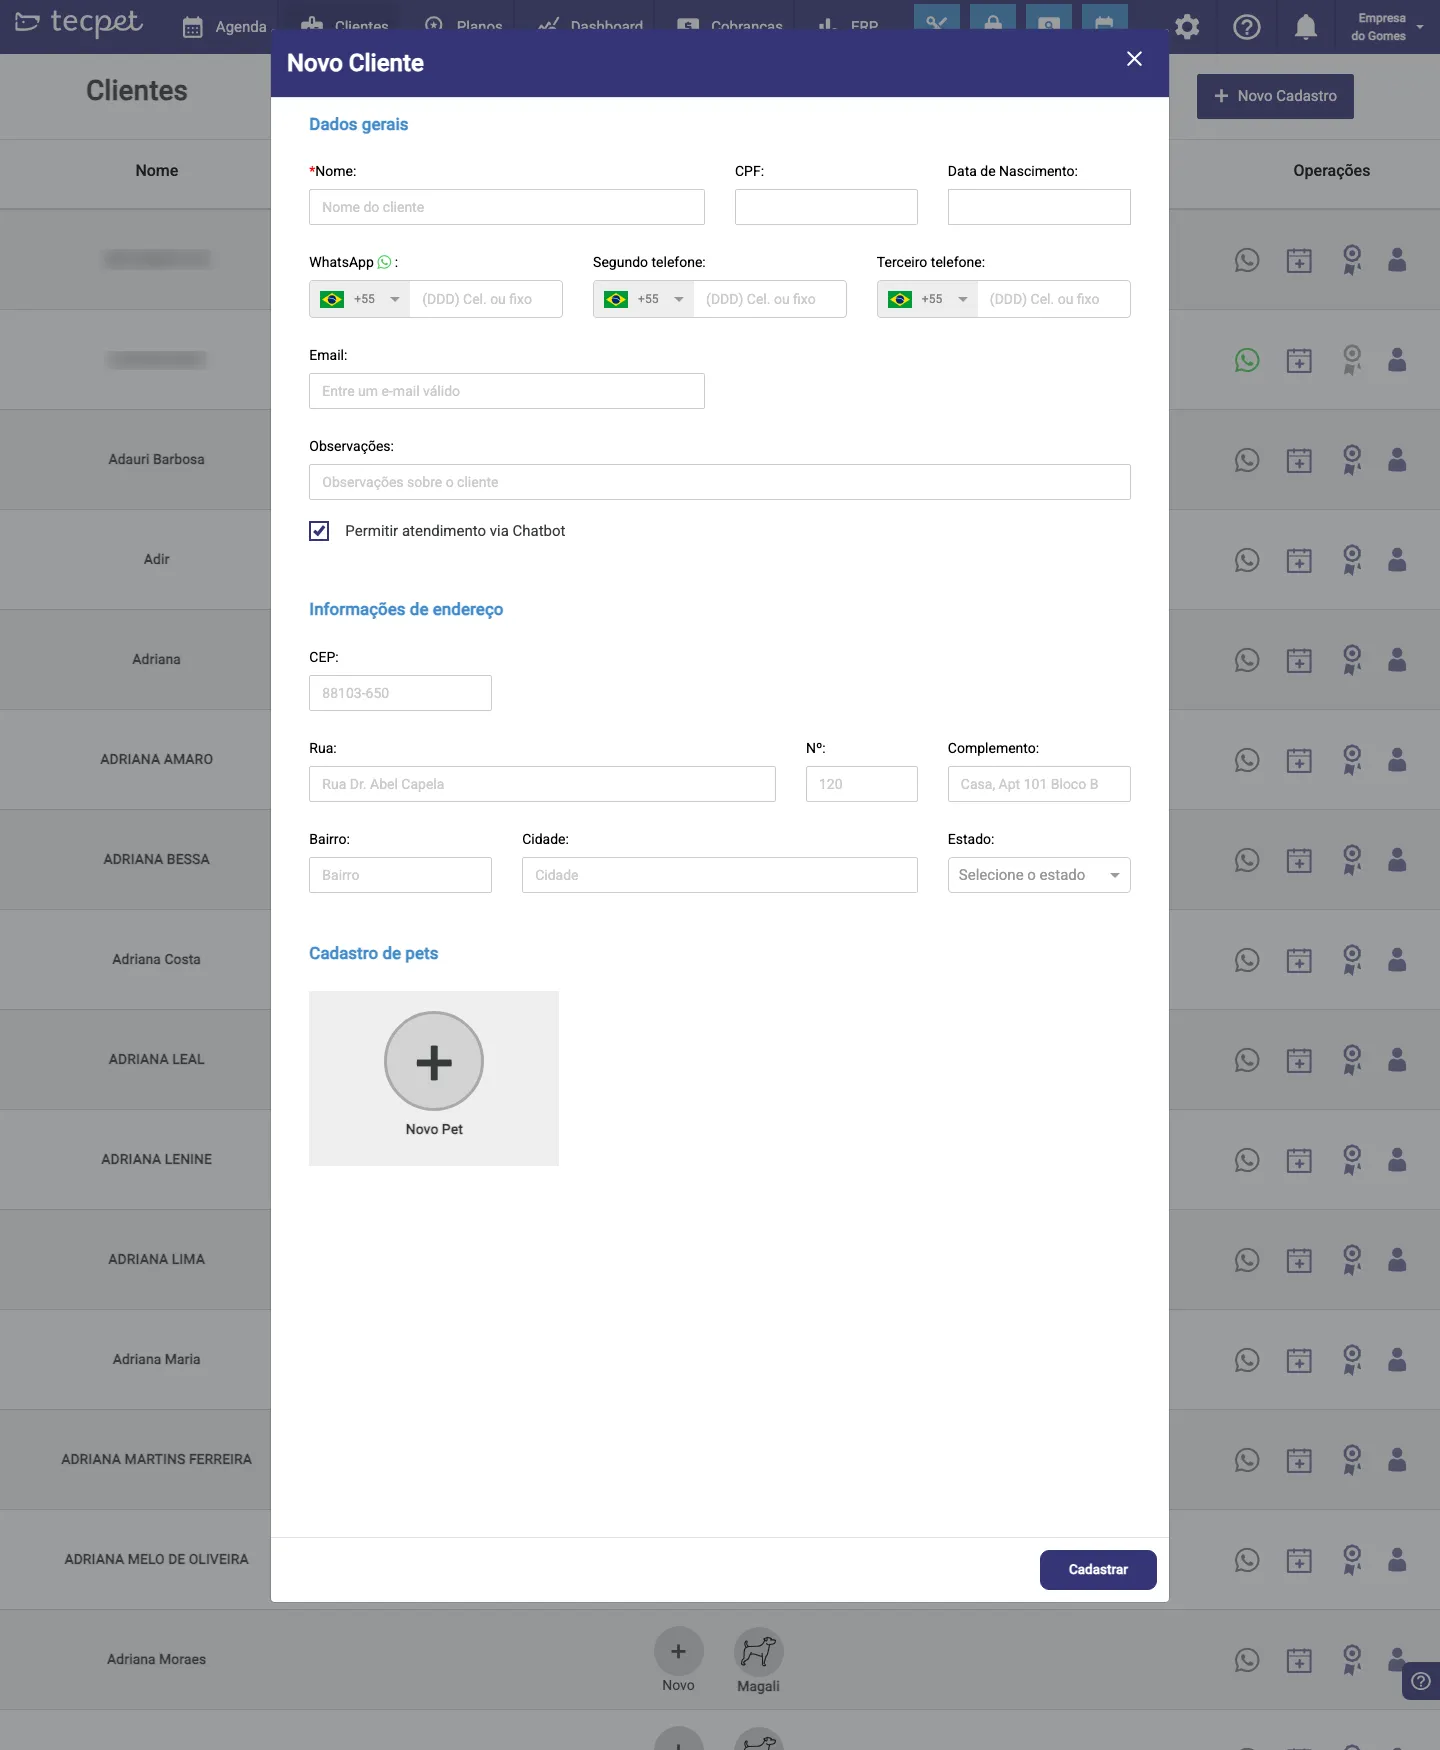
Section titled “Step 2: Fill in the general data”In the General data section:
- Name*: required (the owner’s name; for a business, the company name);
- Tipo de pessoa (person type), Pessoa Física (individual) or Pessoa Jurídica (business) (see below);
- CPF (individual) or CNPJ (business), the document changes with the person type;
- Date of Birth: optional;
- WhatsApp: country + area code + number; this is where confirmations, reminders and the AI go out;
- Second phone and Third phone: extra contacts;
- Email and Notes: optional;
- Allow chatbot service: checked by default; controls whether the AI/chatbot serves this customer on WhatsApp.
Individual or business (Pessoa Física / Pessoa Jurídica)
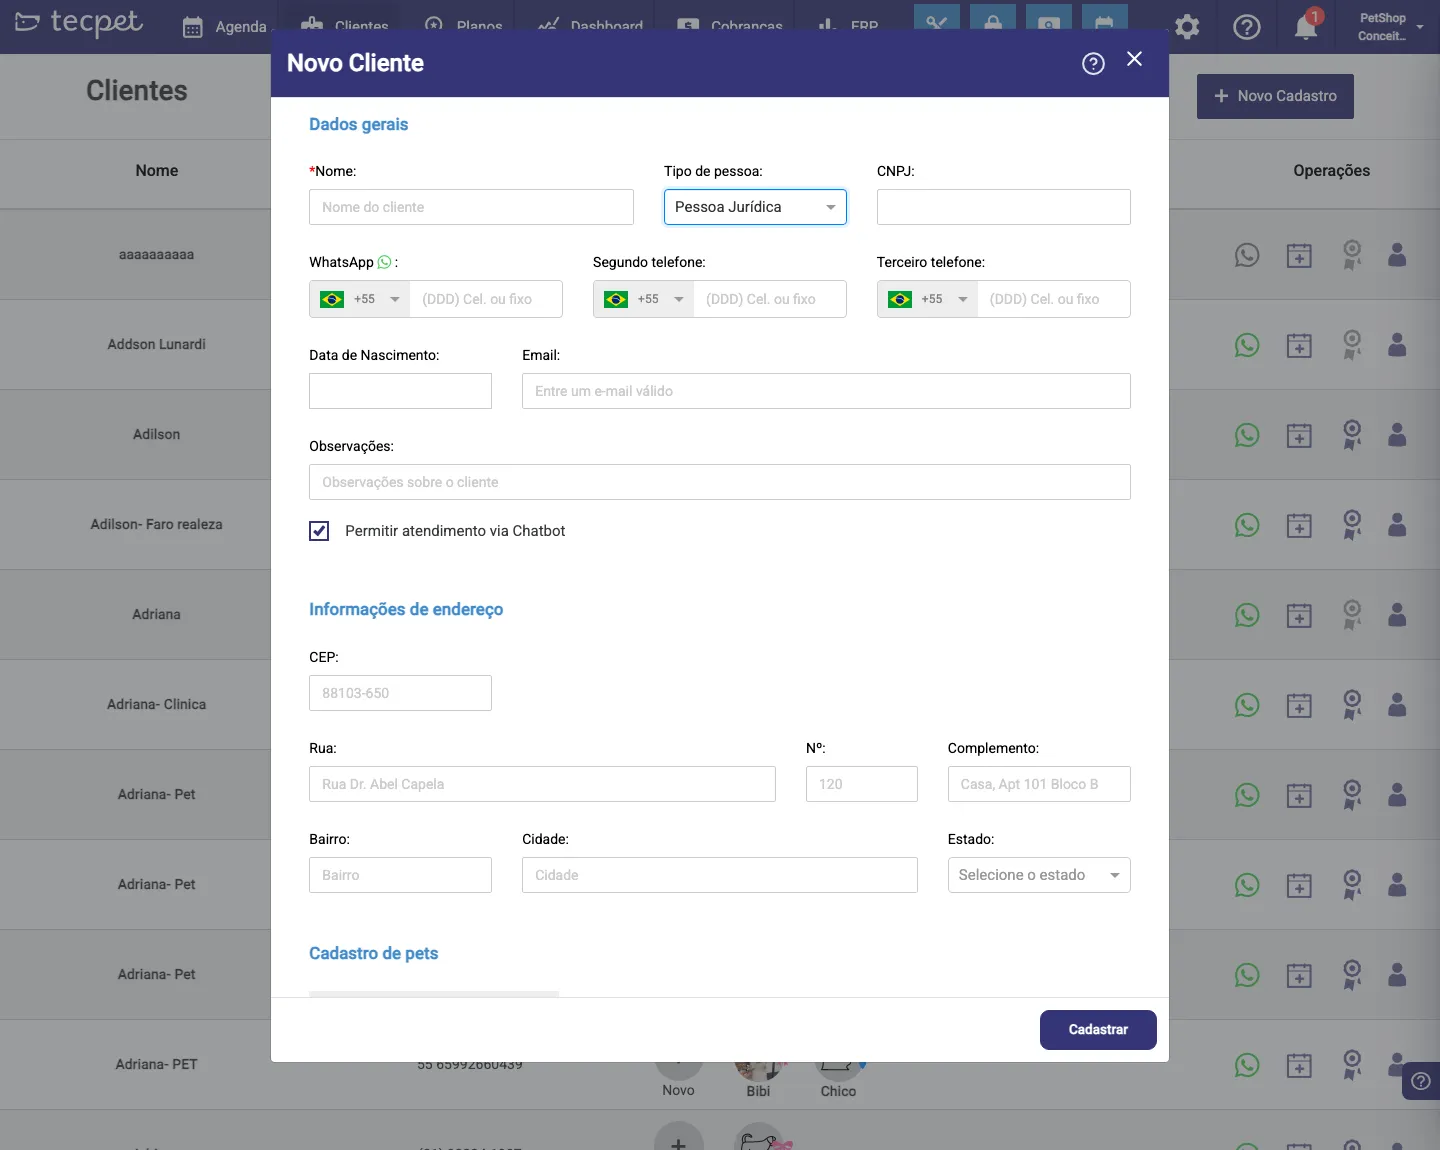
Section titled “Individual or business (Pessoa Física / Pessoa Jurídica)”In the Tipo de pessoa (person type) field you choose between Pessoa Física (individual), which shows the CPF field, and Pessoa Jurídica (business), which shows the CNPJ field. The Name field works for both: the owner’s name or the company’s name. If your shop has an ERP integration, the person type and the CNPJ are synced to the ERP, so the invoice comes out with the company’s correct details.
Step 3: Enter the address
Section titled “Step 3: Enter the address”In the Address information section, fill in the postal code (the other fields can be completed from it): Street, Number, Complement, Neighborhood, City and State. The address is used in documents and in the Pickup & delivery route.
Step 4: Register the pet (optional, but recommended)
Section titled “Step 4: Register the pet (optional, but recommended)”In the Pet registration section, click the New Pet card to register the animal right along with the customer. The pet form opens with species, breed, size, etc., see Register and edit a pet for the detail of each field.
Step 5: Save
Section titled “Step 5: Save”Click Register. If the phone is in an invalid format, the system warns you, fix it and save again. Done: the customer now appears in the Customers list and can be used in appointments and sales.
How to edit a customer later
Section titled “How to edit a customer later”In the Customers list, click the customer’s name to open their profile (or use the person icon in the row’s Operations). In the profile you update the data and manage pets, plans, appointments and billing.