Change an appointment
Everything you do to an already-created appointment happens in its details window. To open it, click the appointment’s card on the Calendar.
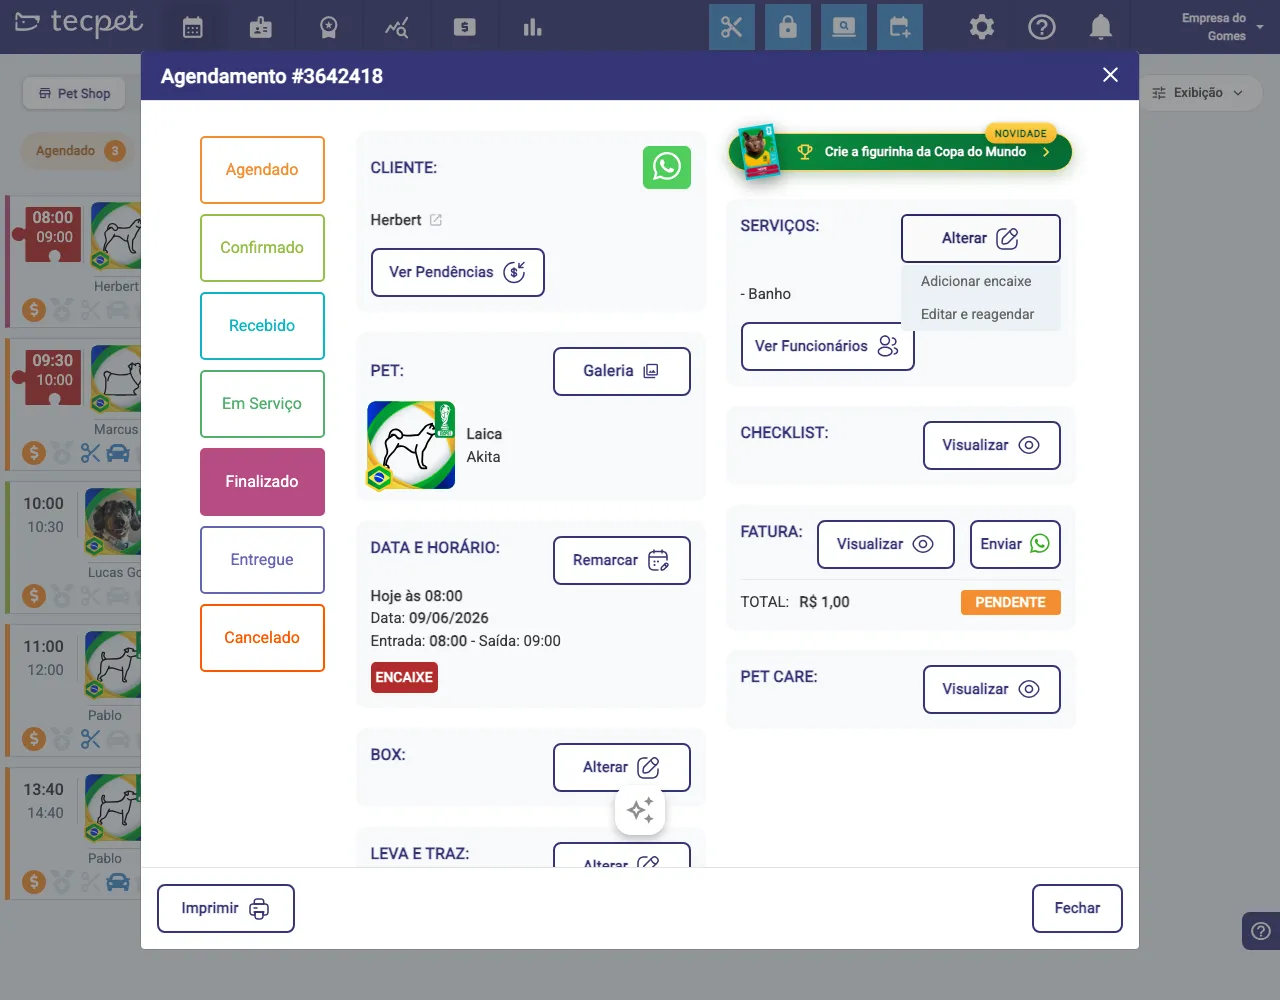
The details window
Section titled “The details window”The window shows, on one side, the status flow and, on the other, the visit blocks: Customer, Pet, Date & Time, Box, Pickup & delivery, Services, Checklist, Invoice and Pet Care. Each block has its own action button.

Change the status
Section titled “Change the status”In the left column, click the status the visit moved to:
- Scheduled → Confirmed → Received → In Service → Finished → Delivered, or Cancelled.
The card moves to the matching column on the Calendar instantly. That’s how the team tracks where each pet is.
Reschedule (date and time)
Section titled “Reschedule (date and time)”In the Date & Time block, click Reschedule to pick a new date and time without redoing the appointment. (If the visit was squeezed in, it shows the ENCAIXE tag.)
Change services and add an extra
Section titled “Change services and add an extra”In the Services block, click Change. Two options appear:
- Add squeeze-in — quickly adds an extra visit to that same pet/time;
- Edit & reschedule — reopens the appointment wizard so you can add or remove services, change combos and adjust date/time.
Use Add squeeze-in for a quick extra and Edit & reschedule when you need deeper changes.
Box and Pickup & delivery
Section titled “Box and Pickup & delivery”The Box and Pickup & delivery blocks each have a Change button: set the pet’s box/kennel and enable or adjust the transport (pickup and drop-off) for that visit.
Other actions in the window
Section titled “Other actions in the window”Still in the window you can:
- Invoice — View or Send the charge via WhatsApp;
- Checklist — View the visit’s checklist;
- Pet Care — View the pet’s chart;
- Gallery — visit photos;
- View pending items and the customer’s WhatsApp shortcut;
- Print the sheet.
To create an appointment from scratch, see Create an appointment; to understand the screen, see Understanding the Calendar.