Track your billing
The Billing screen is where you track all your customers’ invoices in one place — what’s open, what’s been paid, what’s overdue. This is where you settle payments, send the charge over WhatsApp and reverse a payment entered by mistake. Everything that becomes money in TecPet (an appointment, a standalone sale, buying a plan) creates an invoice that lands on this list. To understand what’s inside an invoice (items, discount, note), see The invoice in detail.
Step 1 — Open the Billing screen
Section titled “Step 1 — Open the Billing screen”In the top menu, click Billing. The list opens already showing the invoices from the last few days.
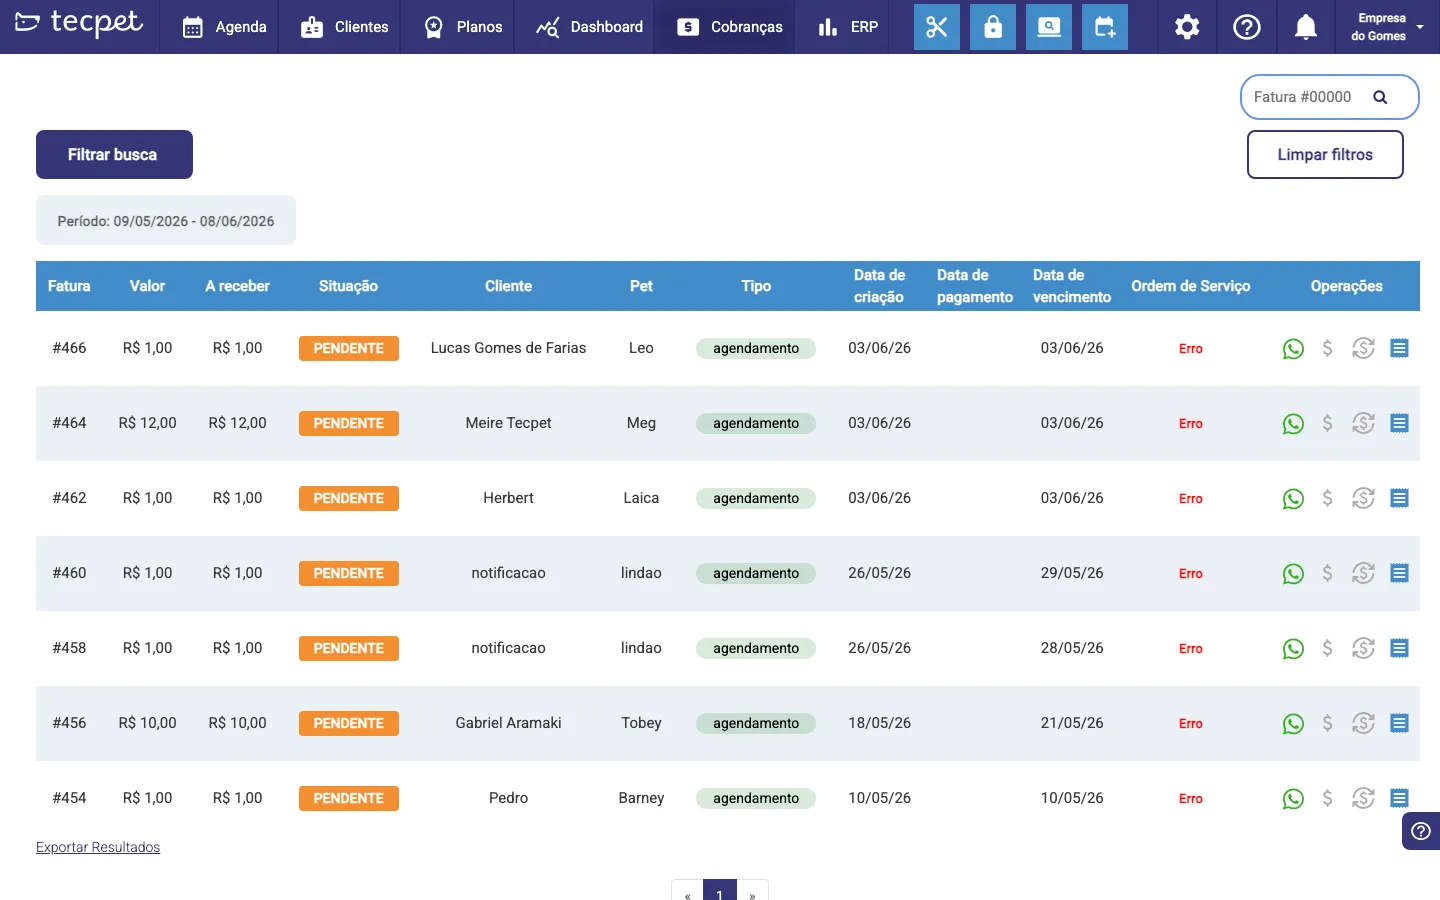
Step 2 — Understand the invoice list
Section titled “Step 2 — Understand the invoice list”Each row is one invoice. The columns show:
- Invoice — the invoice number (e.g. #00123);
- Amount — the invoice total;
- To receive — how much is still owed (if fully paid, it shows -);
- Status — Paid, Pending, Overdue, Canceled or No Charge;
- Pet — the pet tied to the invoice (when there is one);
- Type — Appointment, Plan, Standalone or Voucher;
- ERP Items — only appears when the store has a system (ERP) integrated; shows the invoice’s fiscal/ERP status.
The Operations on each invoice
Section titled “The Operations on each invoice”On the right of each row, in the Operations column, are the invoice’s action buttons:
- Send the invoice (WhatsApp icon) — sends the charge straight to the customer’s WhatsApp;
- Pay invoice (blue dollar sign) — opens the window to settle the payment; it is disabled when the invoice is already Paid, Canceled, No Charge, or when the store takes payments via POS;
- Reverse payments (red arrow) — undoes the invoice’s payments; appears only in some stores and is only active when there’s an amount already paid;
- Invoice details (receipt icon) — opens the full invoice modal, with items, discount and the action footer (explained in The invoice in detail).
Step 3 — Filter what you’re looking for
Section titled “Step 3 — Filter what you’re looking for”Click Filter search to open the Filter window. Pick the fields you want (see below what each one is) and click Filter in the footer. The active filters stay visible at the top of the list. To look up an invoice by number, type it in the Invoice #00000 field in the top corner. Clear filters (or the Clear button inside the window) brings back the full list.
The fields in the Filter window
Section titled “The fields in the Filter window”- Segments — choose which segments (Pet Shop, Clinic, Daycare/Hotel) you want to see invoices from; comes with all selected;
- Customer — finds the invoices of a specific customer;
- Period — Today, Current month, Last 7 days, Last 30 days or Custom (pick a start and end date, at most 1 year apart);
- Filter by date of — says which date the period above uses: Creation, Due or Payment;
- Status — All, Paid, Open, Overdue, Canceled or No Charge;
- Type — All, Appointment, Plan/Package, Standalone or Voucher.
Step 4 — Settle the payment of an invoice
Section titled “Step 4 — Settle the payment of an invoice”To record that the customer paid:
- On the invoice row, click Pay invoice (the blue dollar sign in Operations);
- The Invoice #… window opens, showing the Open amount, the customer and the pet;
- Choose the Payment method (cash, card, Pix, etc.);
- Check the Amount to receive* (required field) — in cash, the system computes the change; on card/Pix, an extra amount if there’s a surplus;
- If the customer has a Voucher balance, tick Use Voucher to deduct from the credit;
- Click Pay. The invoice moves to Paid.
Step 5 — Pay several invoices at once (batch)
Section titled “Step 5 — Pay several invoices at once (batch)”When the store does not have a system (ERP) integrated, you can settle several invoices together:
- Tick the checkbox on each invoice you want to pay (or click Select all at the top of the list);
- With two or more selected, click the Pay invoices button;
- Check the amounts and payment method in the window that opens and confirm.
(In stores with an ERP integrated, this button doesn’t appear — each invoice is paid individually using the previous step.)
Step 6 — Send or print several invoices
Section titled “Step 6 — Send or print several invoices”Still using the selection checkboxes, with at least one invoice ticked you can:
- Click Send (WhatsApp icon) — sends the selected invoices to the customer’s WhatsApp;
- Click Print — opens the selected invoices for printing.
To send a single invoice, use the WhatsApp button on its own row, in Operations.
Step 7 — Reverse a payment (if entered by mistake)
Section titled “Step 7 — Reverse a payment (if entered by mistake)”If you settled an invoice by mistake:
- On the already-paid invoice row, click Reverse payments (the red arrow in Operations);
- The warning “Reverse payments? All the invoice’s payments will be reversed and this cannot be undone.” appears;
- Confirm with Reverse (and, if asked, confirm the responsible employee).
The invoice goes back to open and you can settle it again, fixing the payment method or amount. Heads up: this undoes all the invoice’s payments at once.
How to edit or check an invoice later
Section titled “How to edit or check an invoice later”To view or adjust an invoice’s content (items, discount, note, due date), click Invoice details (the receipt icon) on its row — it opens the full modal, explained in The invoice in detail. The store’s general billing rules (default due date, interest, accepted payment methods) live in Billing parameters. If the store has a system (ERP), see how invoices turn into fiscal notes in What changes with the integration.
What changes with your system (ERP)
Section titled “What changes with your system (ERP)”Without an integrated ERP, the ERP Items column does not appear on the list. You also get an extra button: you can pay several invoices at once (see the batch payment step). Settling just marks the invoice as paid in TecPet — the fiscal note, if you issue one, is done separately in your own tool.
If you use VHSYS
With VHSYS integrated, the ERP Items column appears, showing the status in the ERP’s wording (Open, Done, Error, Canceled…). The pay several invoices in batch button no longer appears — with an integration, each invoice is paid one by one to keep the items in sync with VHSYS. Reverse payments is still available.