Create document templates
Under Settings → Pet Care → Visits you’ll find the Document templates: ready-made, reusable texts you use when recording a visit in the pet’s chart. Instead of typing everything again every appointment, you pick the template and the document comes pre-filled with the right data. Templates feed what you generate in Pet Care — prescriptions, exams, reports, terms and anamneses.
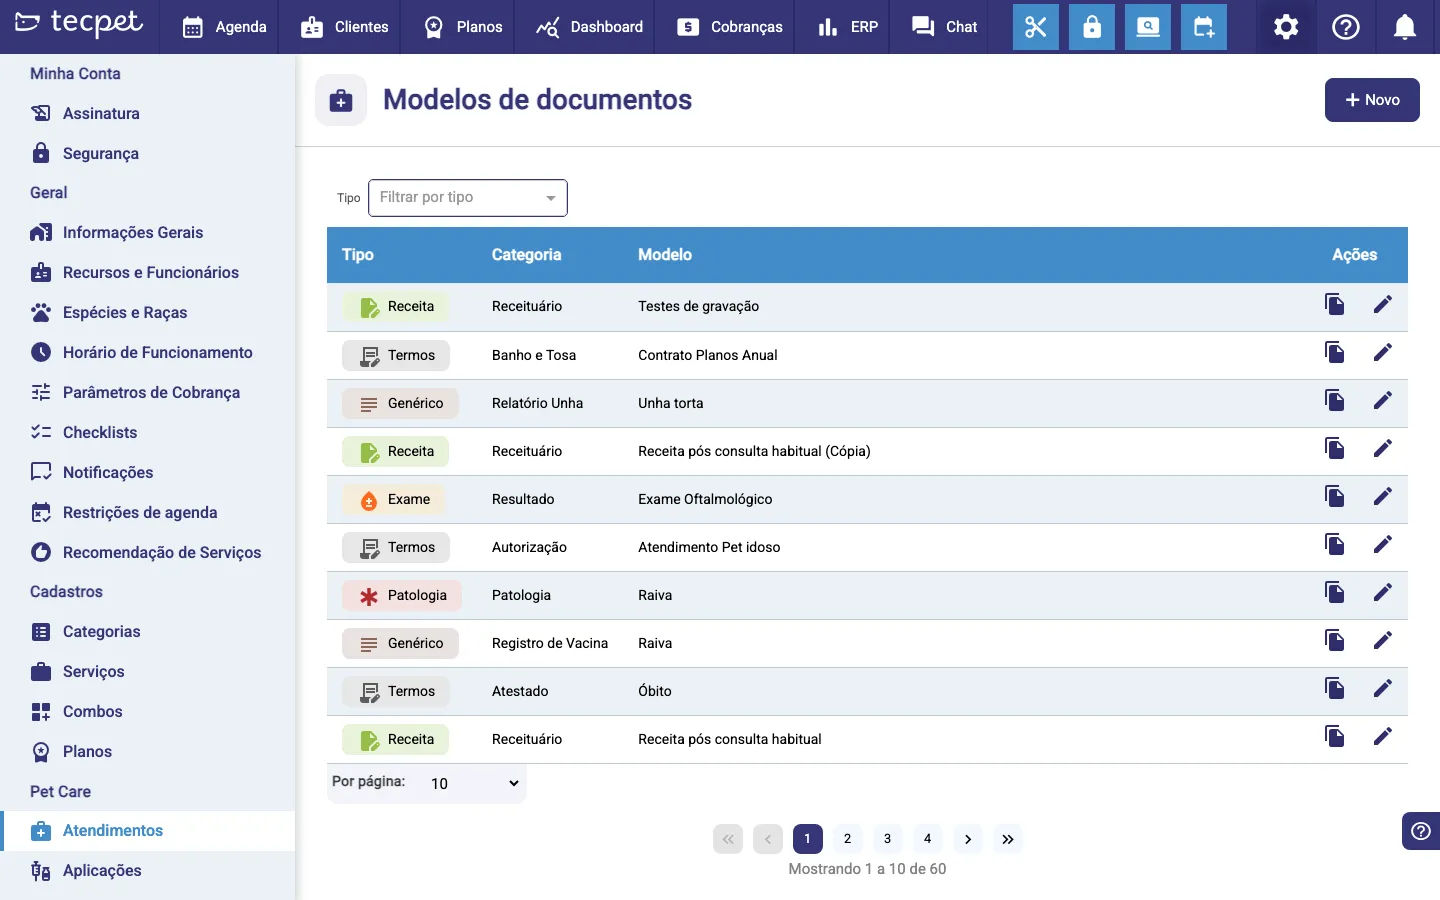
Step 1 — Open Document templates and click New
Section titled “Step 1 — Open Document templates and click New”In the side menu, go to Settings → Pet Care → Visits. The Document templates screen shows the list of what already exists, organized by Type, Category and Template. In the top-right corner, click the New button (with the + sign) to open the creation form.
Step 2 — Fill in the creation form
Section titled “Step 2 — Fill in the creation form”The New visit window opens with the template fields at the top (Type, Category and Template), the Header/Footer selector and, below it, the content editor. Start by choosing the Type — only then does the Category become available. See below what each field is.
Template fields
Section titled “Template fields”- Type — defines where the template shows up in the chart. The options are Anamnesis, Exam, Prescription, Pathology, Terms and Generic;
- Category — a subdivision within the type (e.g. inside Prescription, categories like Antibiotic or Flea treatment). It only becomes available after you pick the type. If the category you want doesn’t exist yet, type the name in the field and choose “New category” to create it on the spot;
- Template — the template’s name, how it will appear in the list (e.g. “Antibiotic prescription”);
- Header/Footer — optional; links the clinic’s letterhead to the document. Build yours in Header and footer.
Step 3 — Write the content and insert variables
Section titled “Step 3 — Write the content and insert variables”In the editor, write the document text normally. To insert a piece of data that fills itself in, type @ and pick the variable from the list that appears. The available variables are:
- From the pet: name, species, breed, size, sex, age, birth date, weight, coat color and microchip;
- From the owner: name, Tax ID, phone and address;
- From the shop: name and address;
- Automatic: date and time of issue.
Beyond these, the custom fields for Customer, Pet and Employee that the store has set up also appear. The Employee variables are filled with whoever signs the document at issue time. That way a single template works for every patient — the right data flows in by itself.
Step 4 — Save
Section titled “Step 4 — Save”Click Save. The template now shows in the list and is ready to be used in the pet’s chart when you generate the document in Pet Care.
How to edit or copy it later
Section titled “How to edit or copy it later”In the template list, each row has two icons in the Actions column:
- Copy (papers icon) — duplicates a similar template, great for creating variations without starting from scratch;
- Edit (pencil icon) — reopens the template with the fields filled in; change what you need and click Save. To delete, open the template and use the Delete button.
Remember that editing a template does not change the documents you’ve already generated — the change only applies to new ones.
At the head office (or in a single store), you freely create and edit every template. The templates the head office shares with the network are distributed to the branches. See Network sync to understand how this sharing works.
Branch
At a branch, the list gets an Origin column: templates marked From Network come from the head office and are view-only (the icon turns into an eye, not a pencil) — you can’t edit them. The My Store templates, created here, you create and edit normally.